DIY Mandalorian Helmet Build
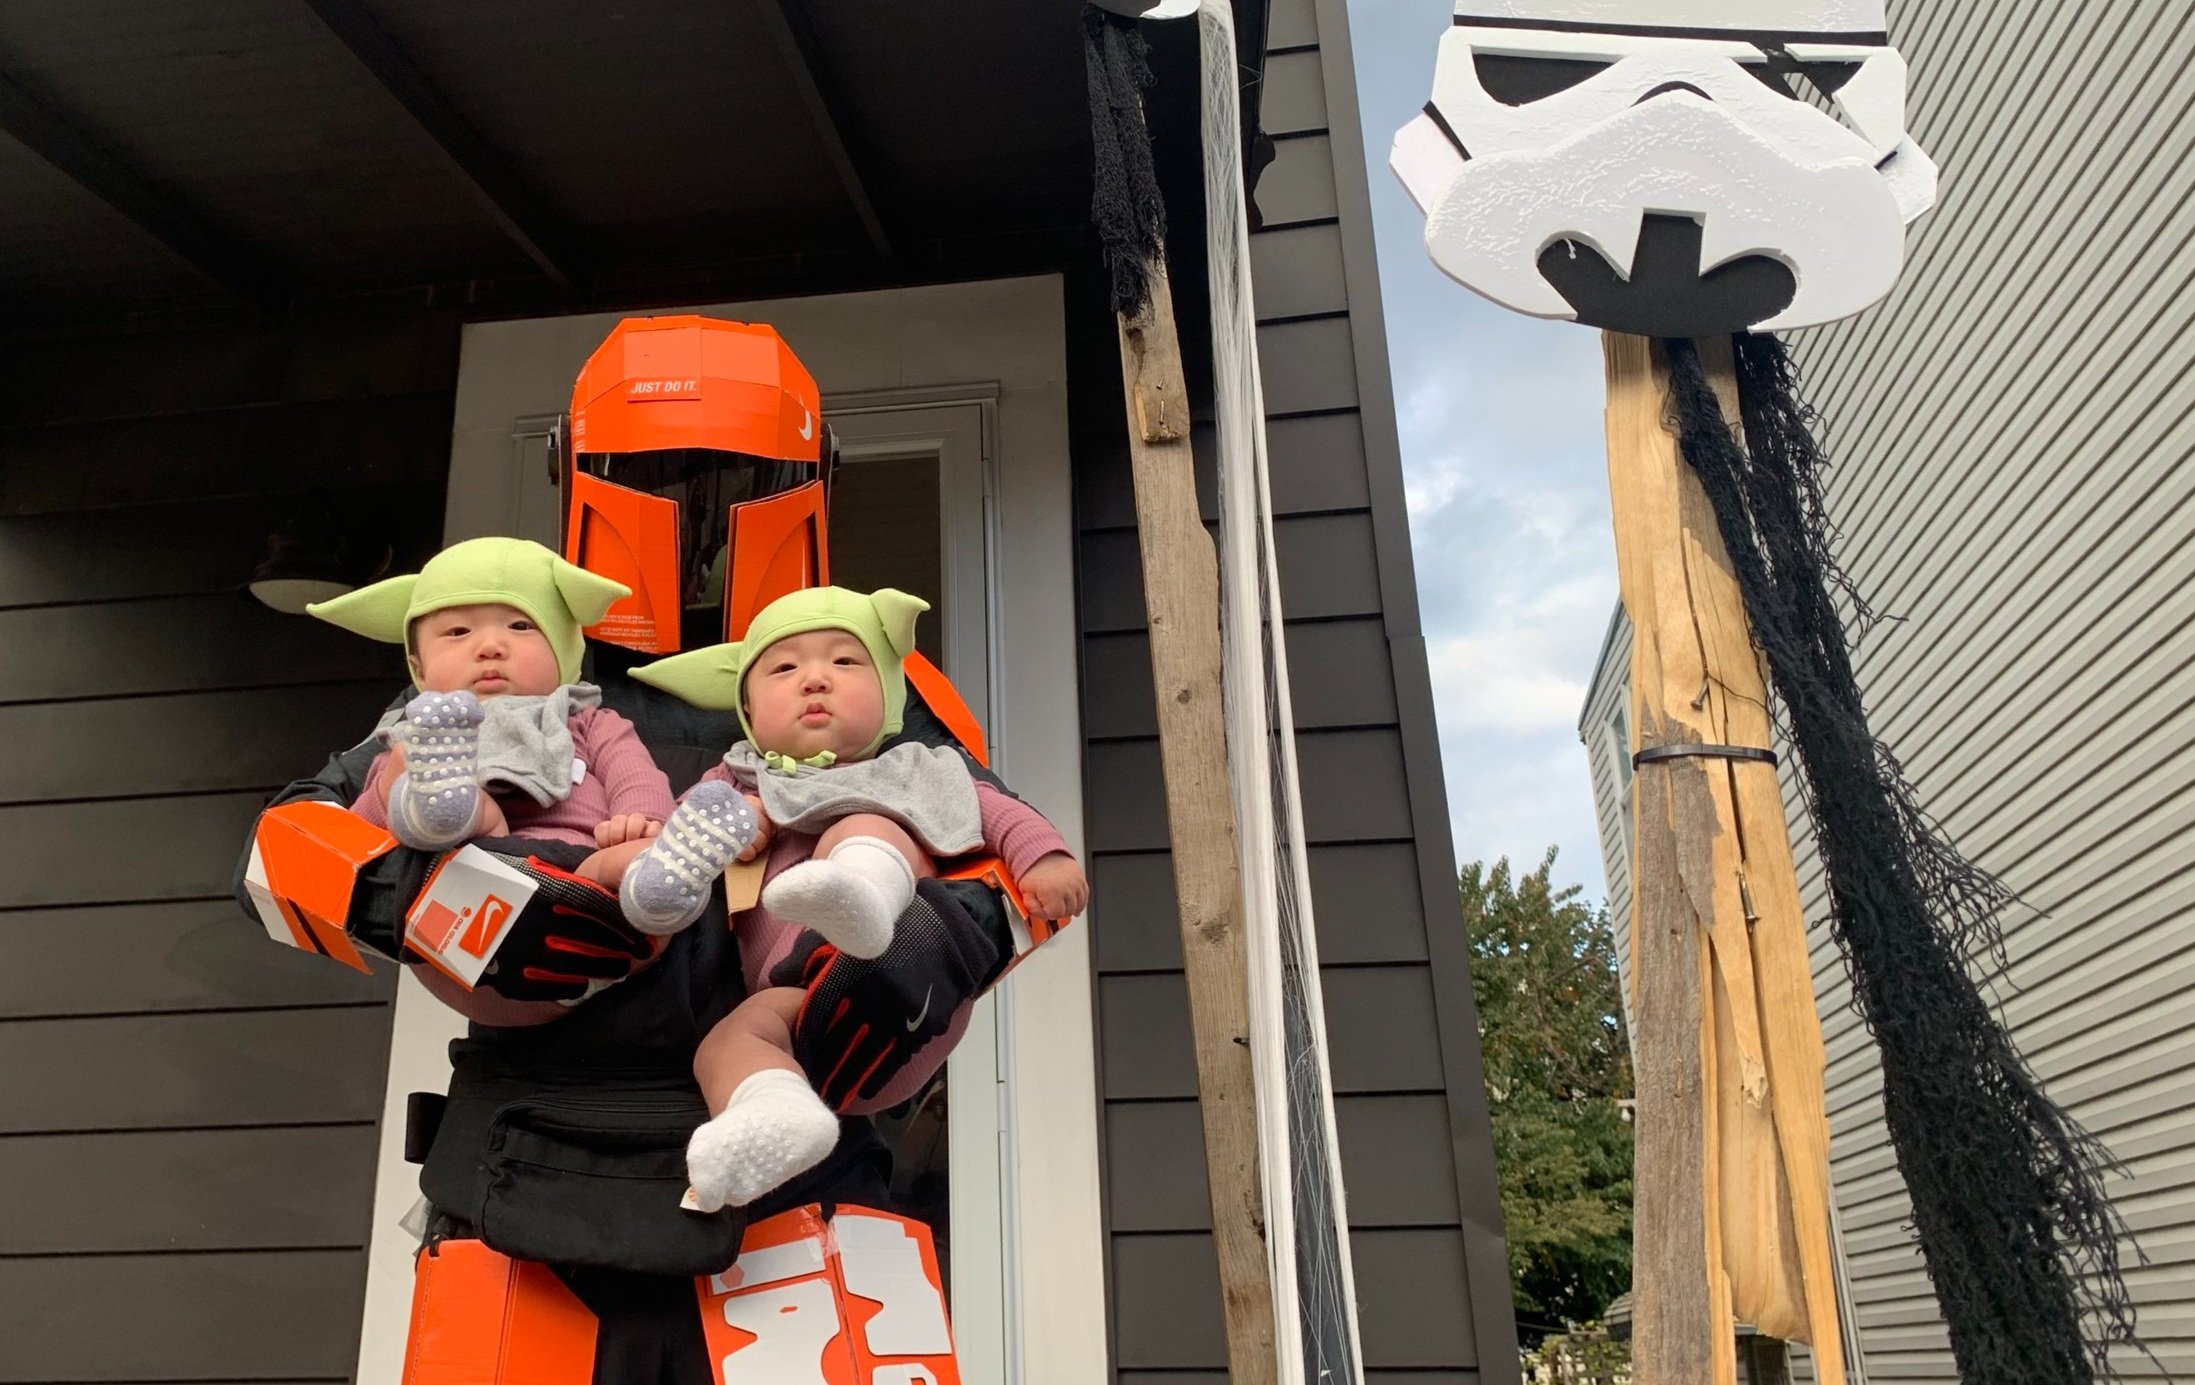
Baby Yodas not included
It’s September, which means Halloween is right around the corner. In this post, I’m going to walk you through on how to build your own Mando helmet similar to the one I built last year. Note: This helmet is meant to fit over a bike helmet, specifically Giro Foray (L) bike helmet or smaller.
What You’ll Need
Hobby knife (X-acto knife)
Scoring Tool
Glue gun
Visor ($17 on Amazon)
Utility Shears (I recommend the Wiss W7T)
Cardboard box (4x Nike shoe boxes for this build)
1x EVA foam (8mm) ($14 on Amazon)
2x Plastic can carriers (Get yourself some beers before getting started)
Prepping for the Shell
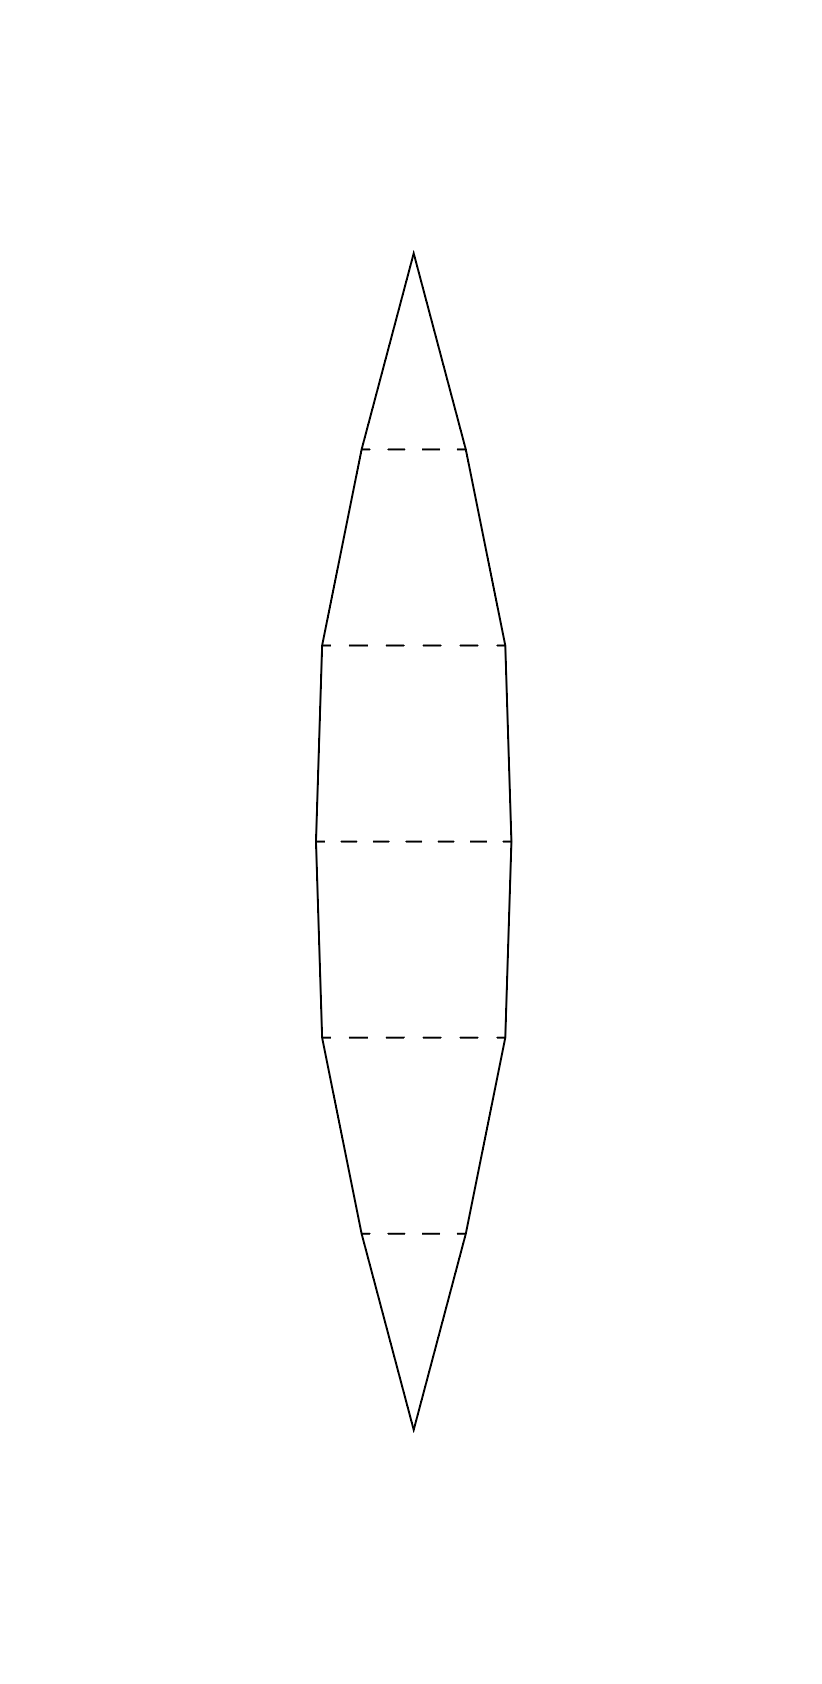
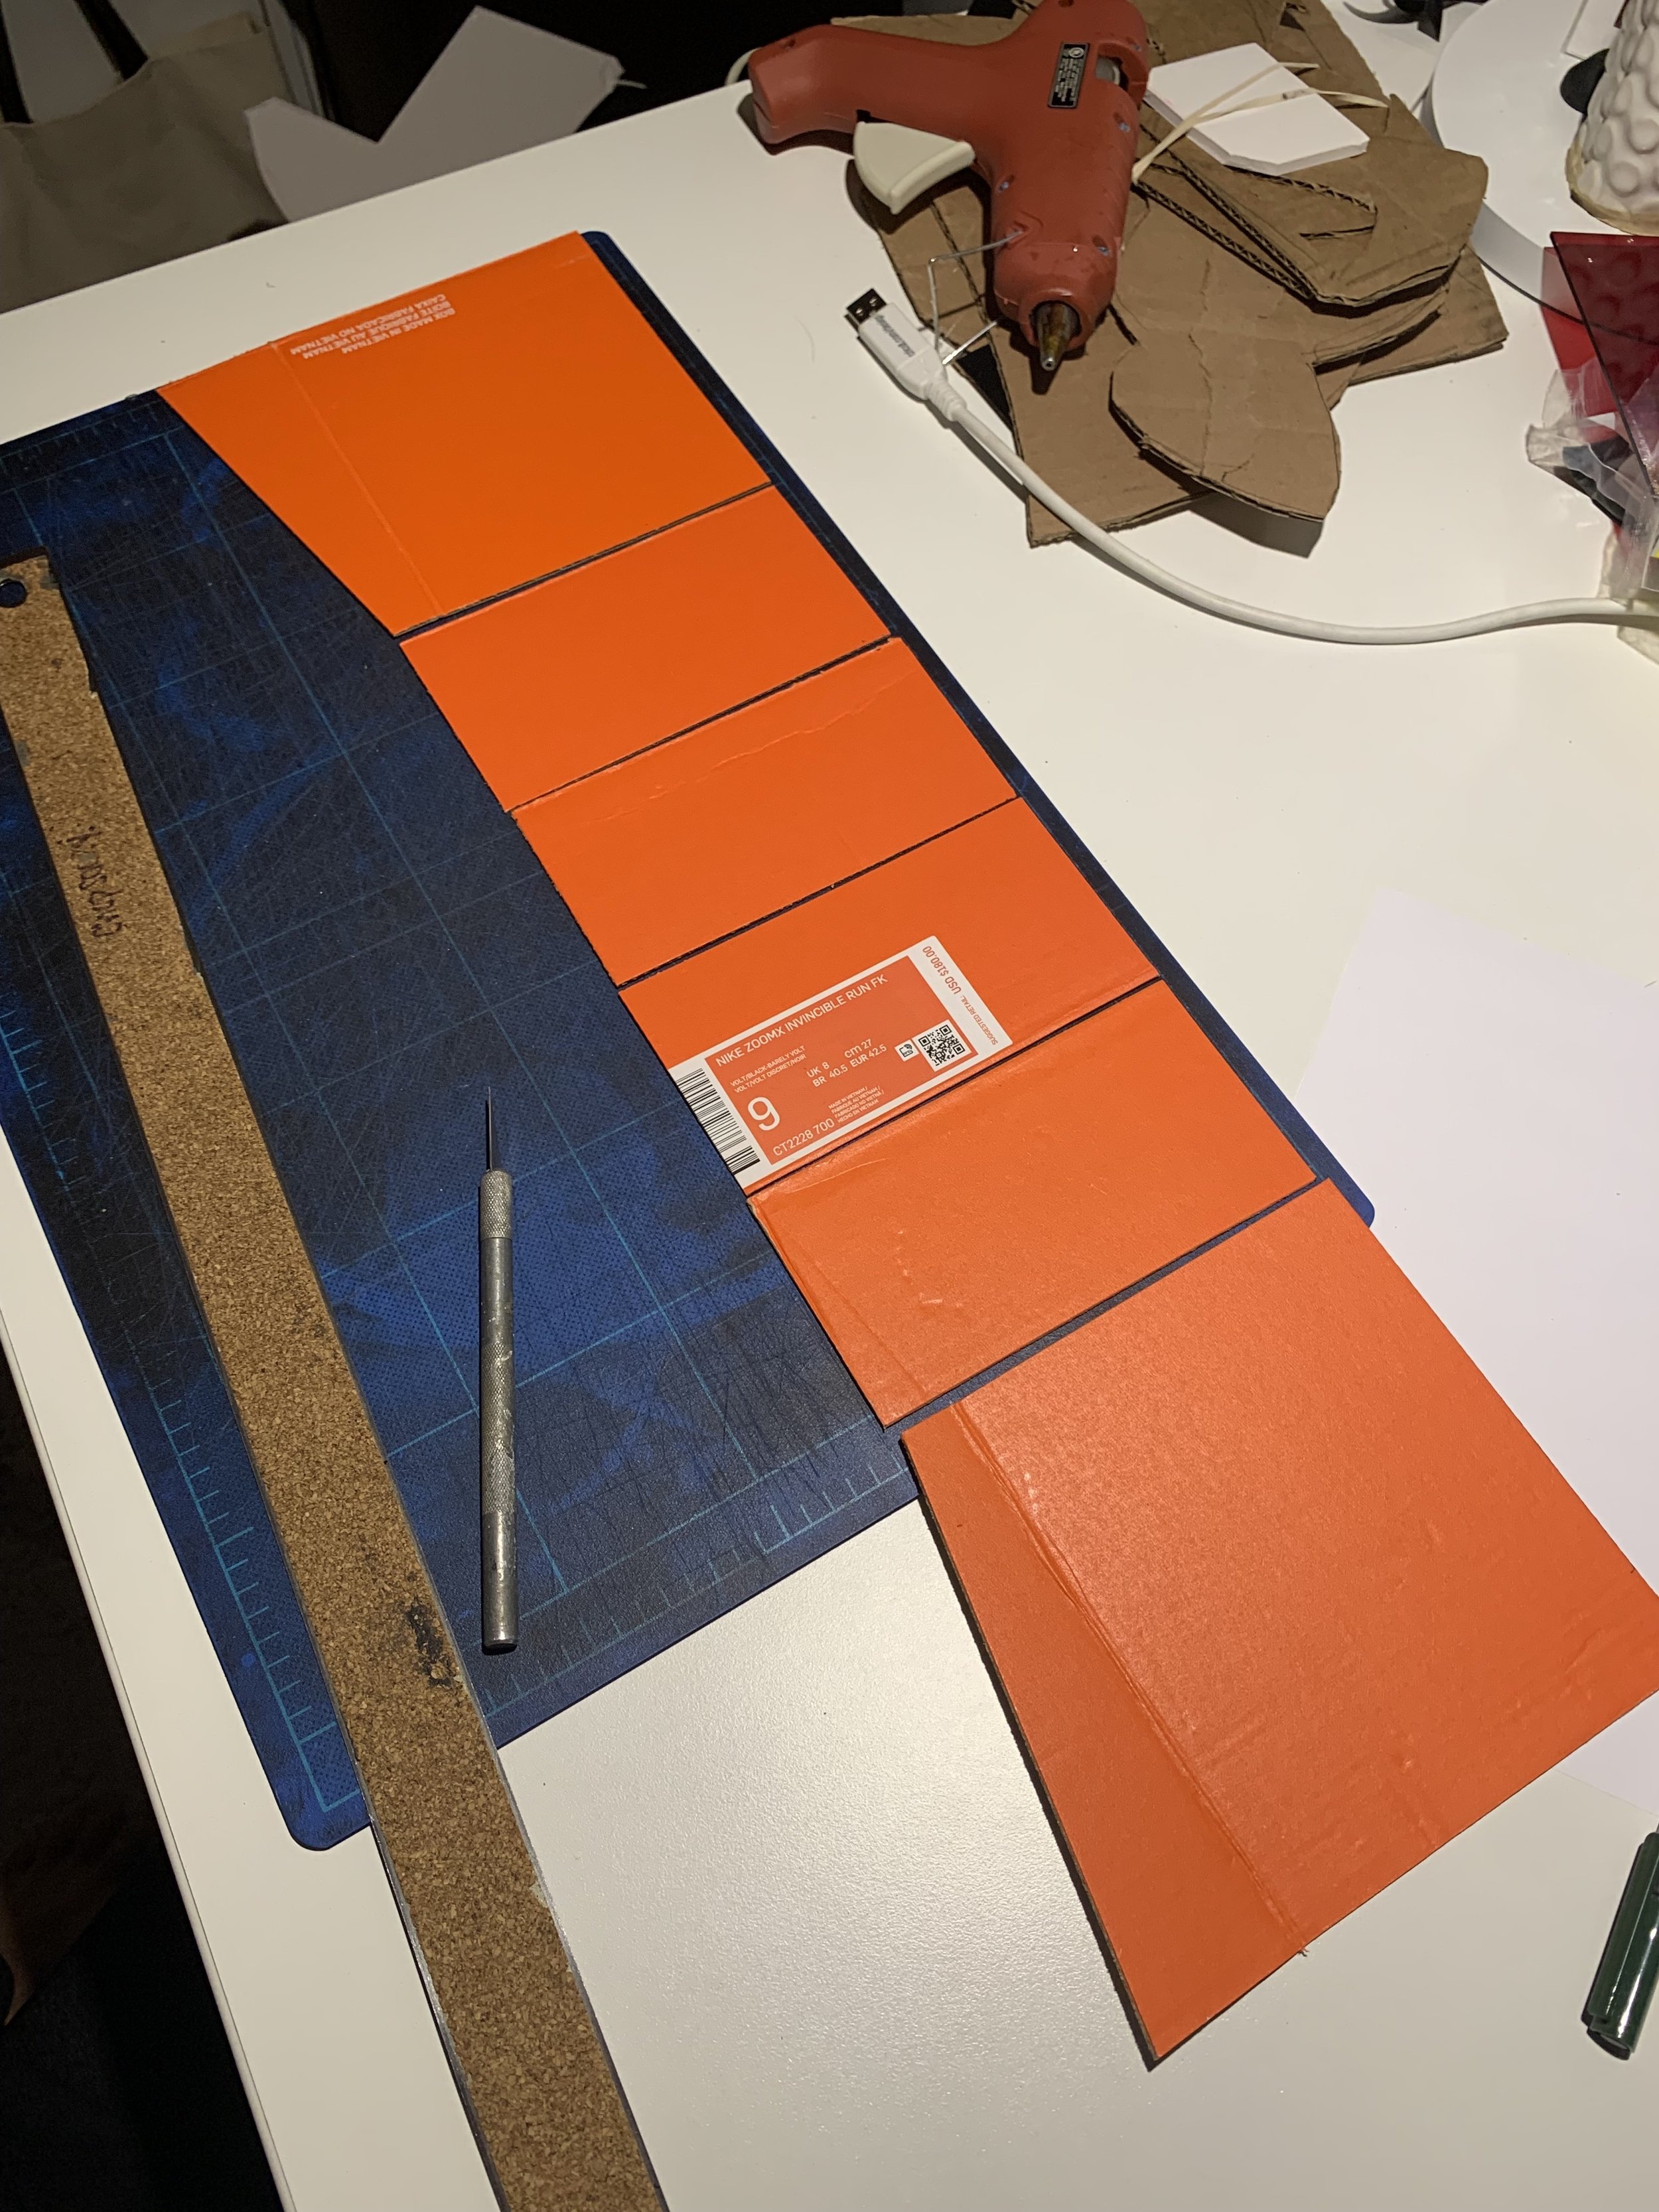
Print the shell pattern (PDF) onto tabloid (11”x17”) paper.
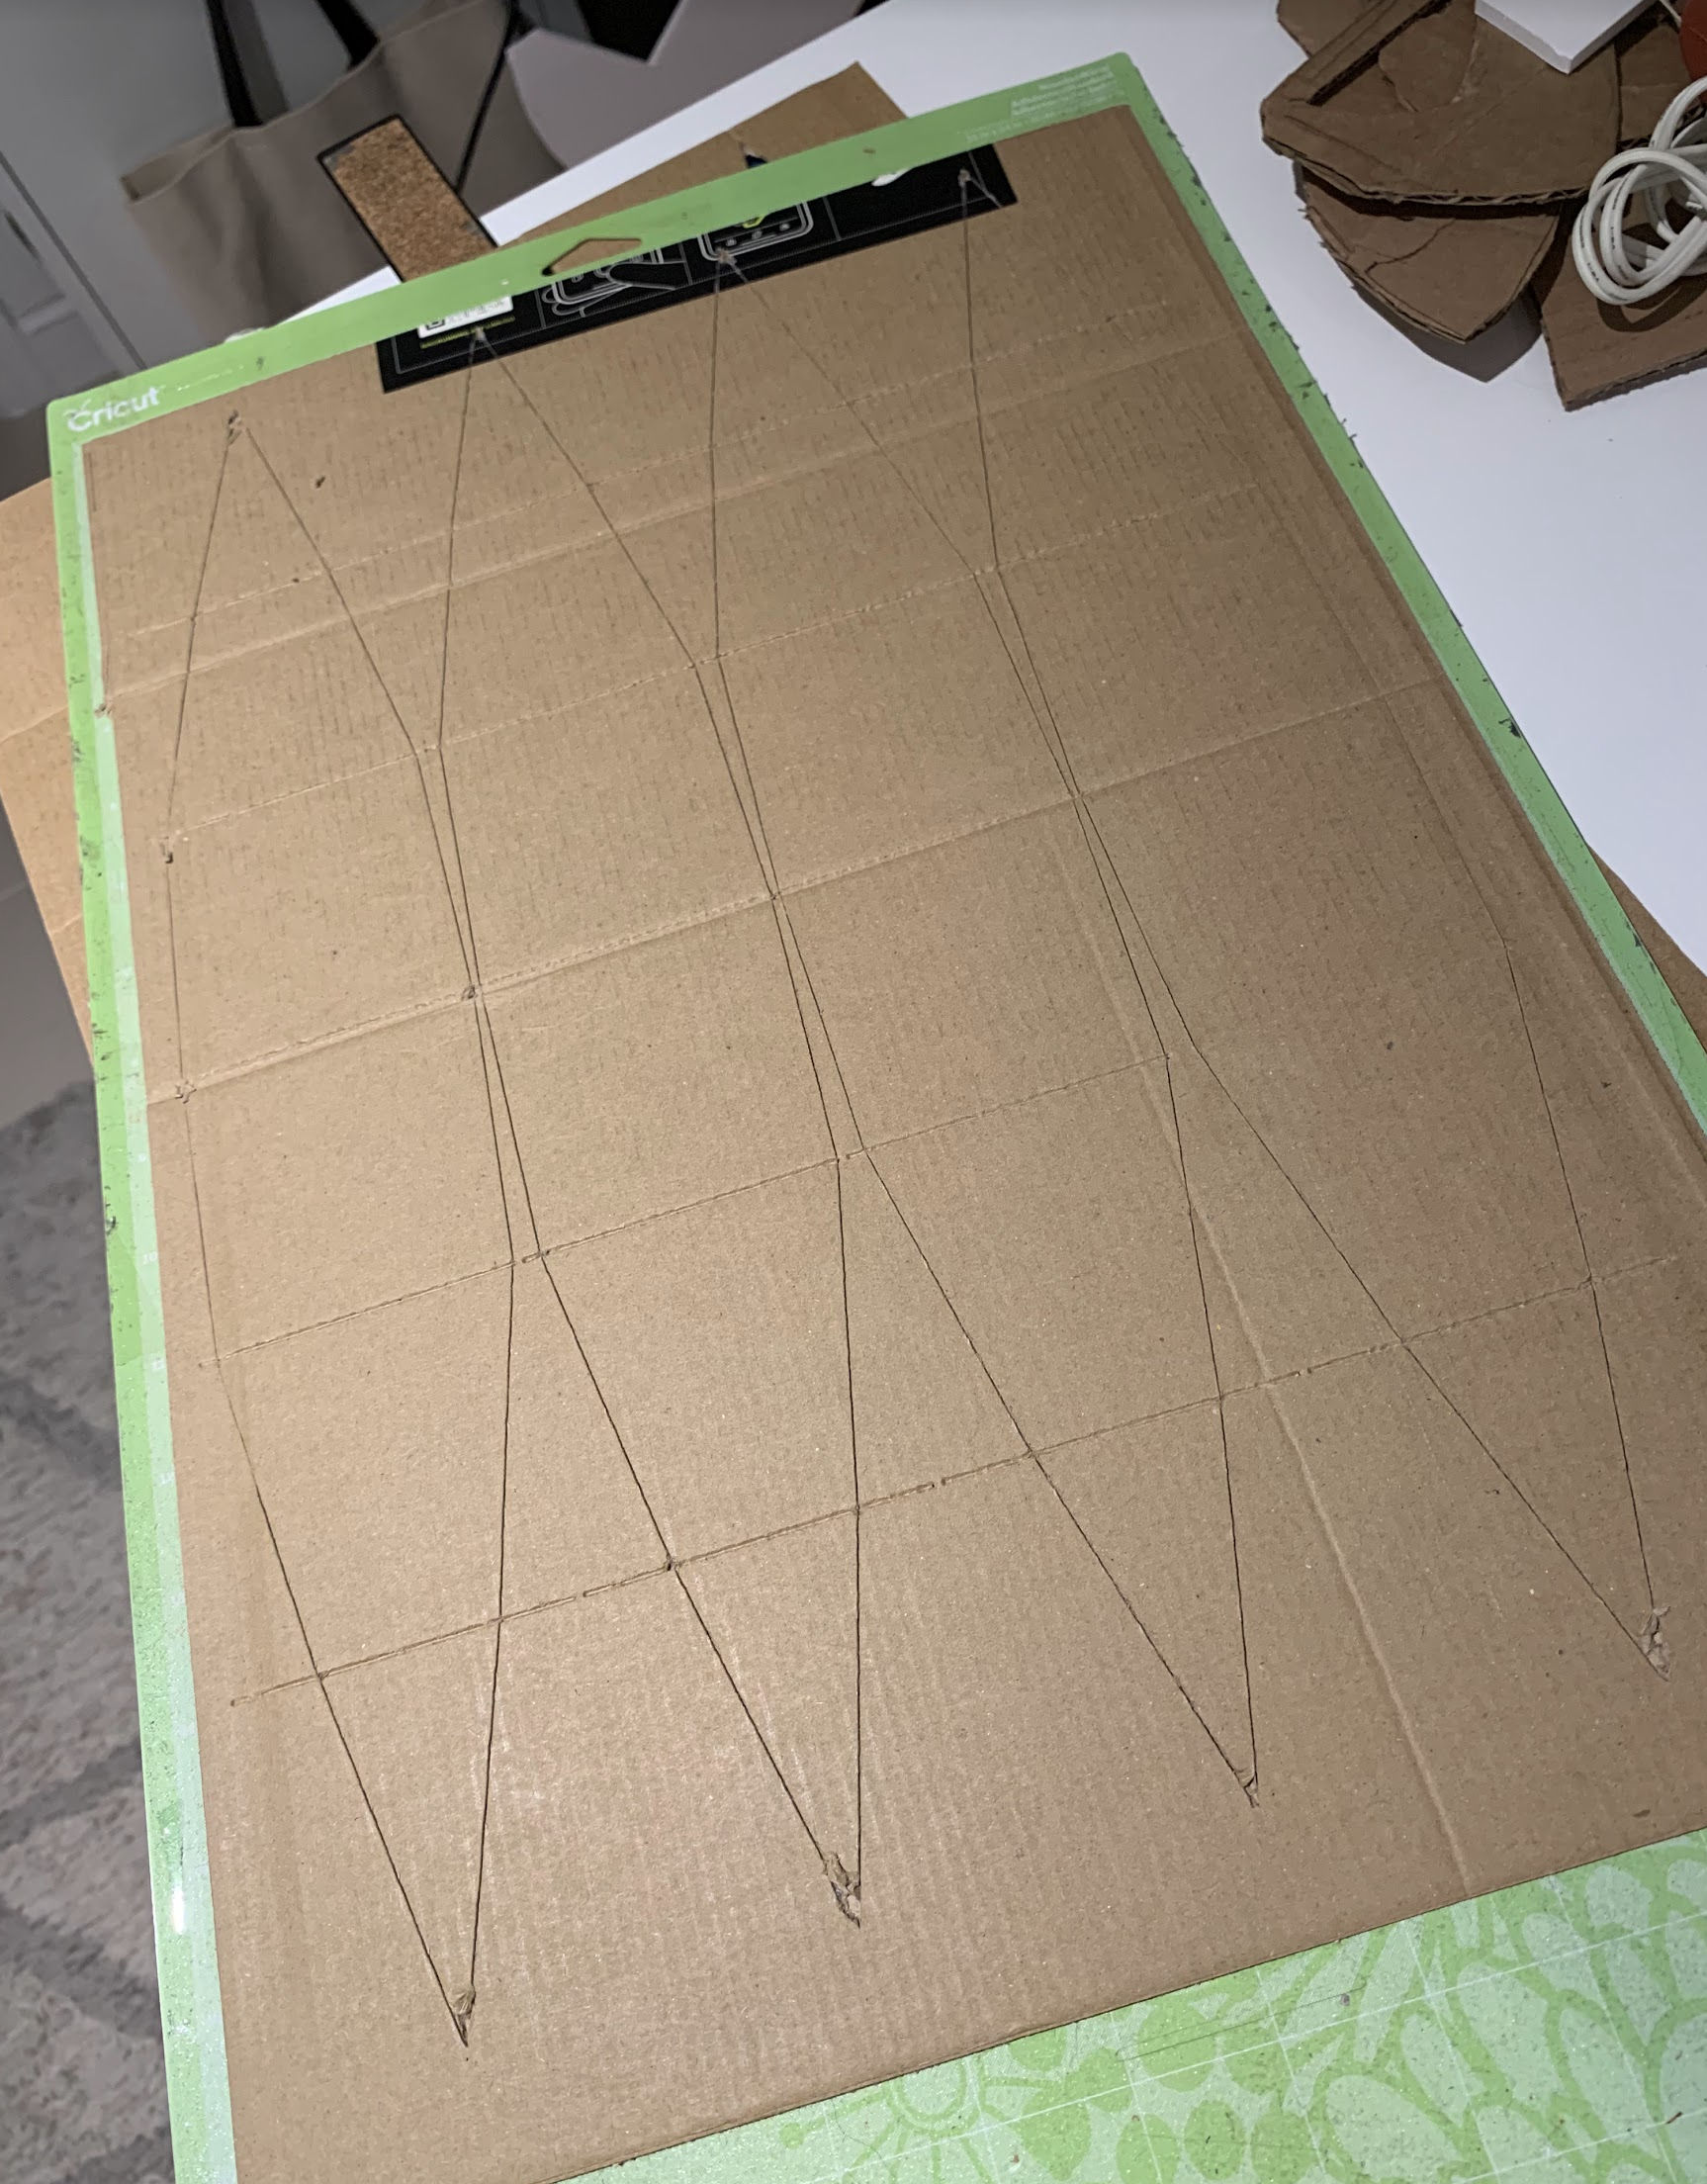
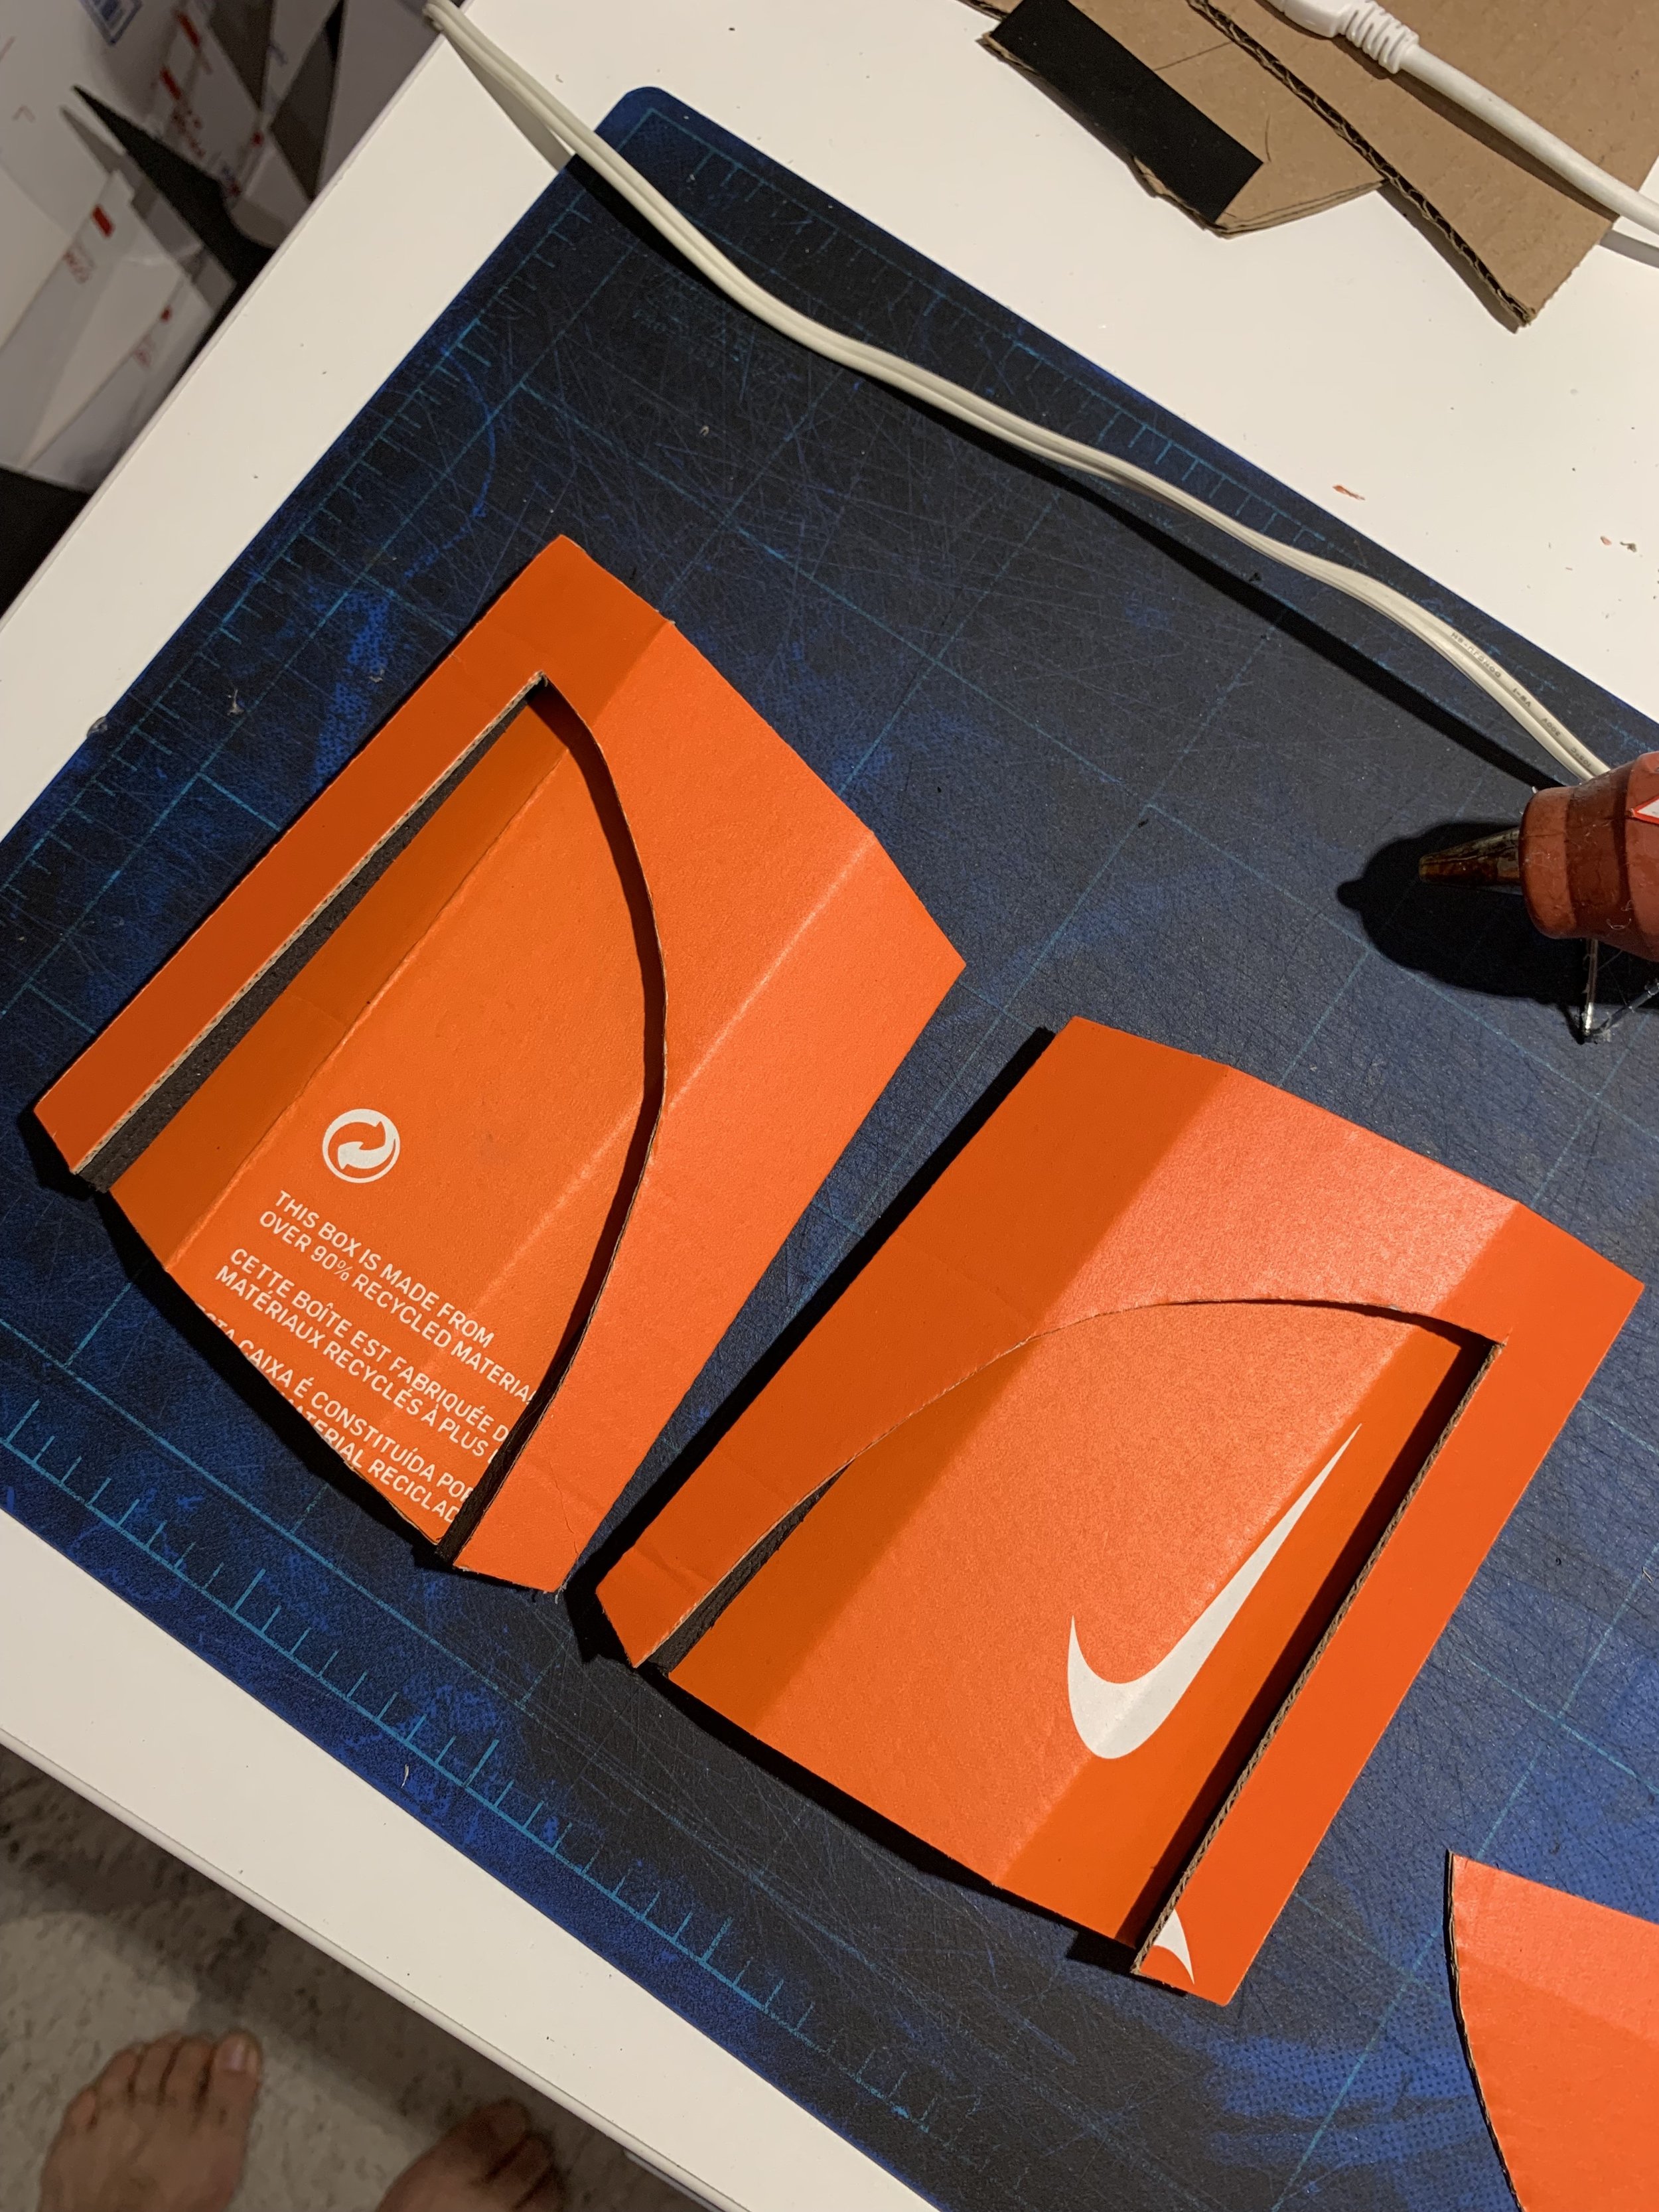
Place your printed shell pattern onto cardboard.
With a ruler, use an X-acto knife to trace/cut the pattern out of the cardboard.
After cutting it out, use your scoring tool to score the dashed lines. I recommend using a ruler when creating your scores.
Once you have your first piece, you’re going to do this 6 more times so you’ll have 7 shell pieces in total. For the remaining pieces, use your shell pattern that you just cut out as a template. Trace, cut, repeat.
Constructing the Shell
Using cardboard scraps, cut out 30 small rectangles measuring about 1.25”x.75”.
Once you have your rectangles, score them lengthwise. These small rectangles will be used to hold the shell pieces that you just cut out together.
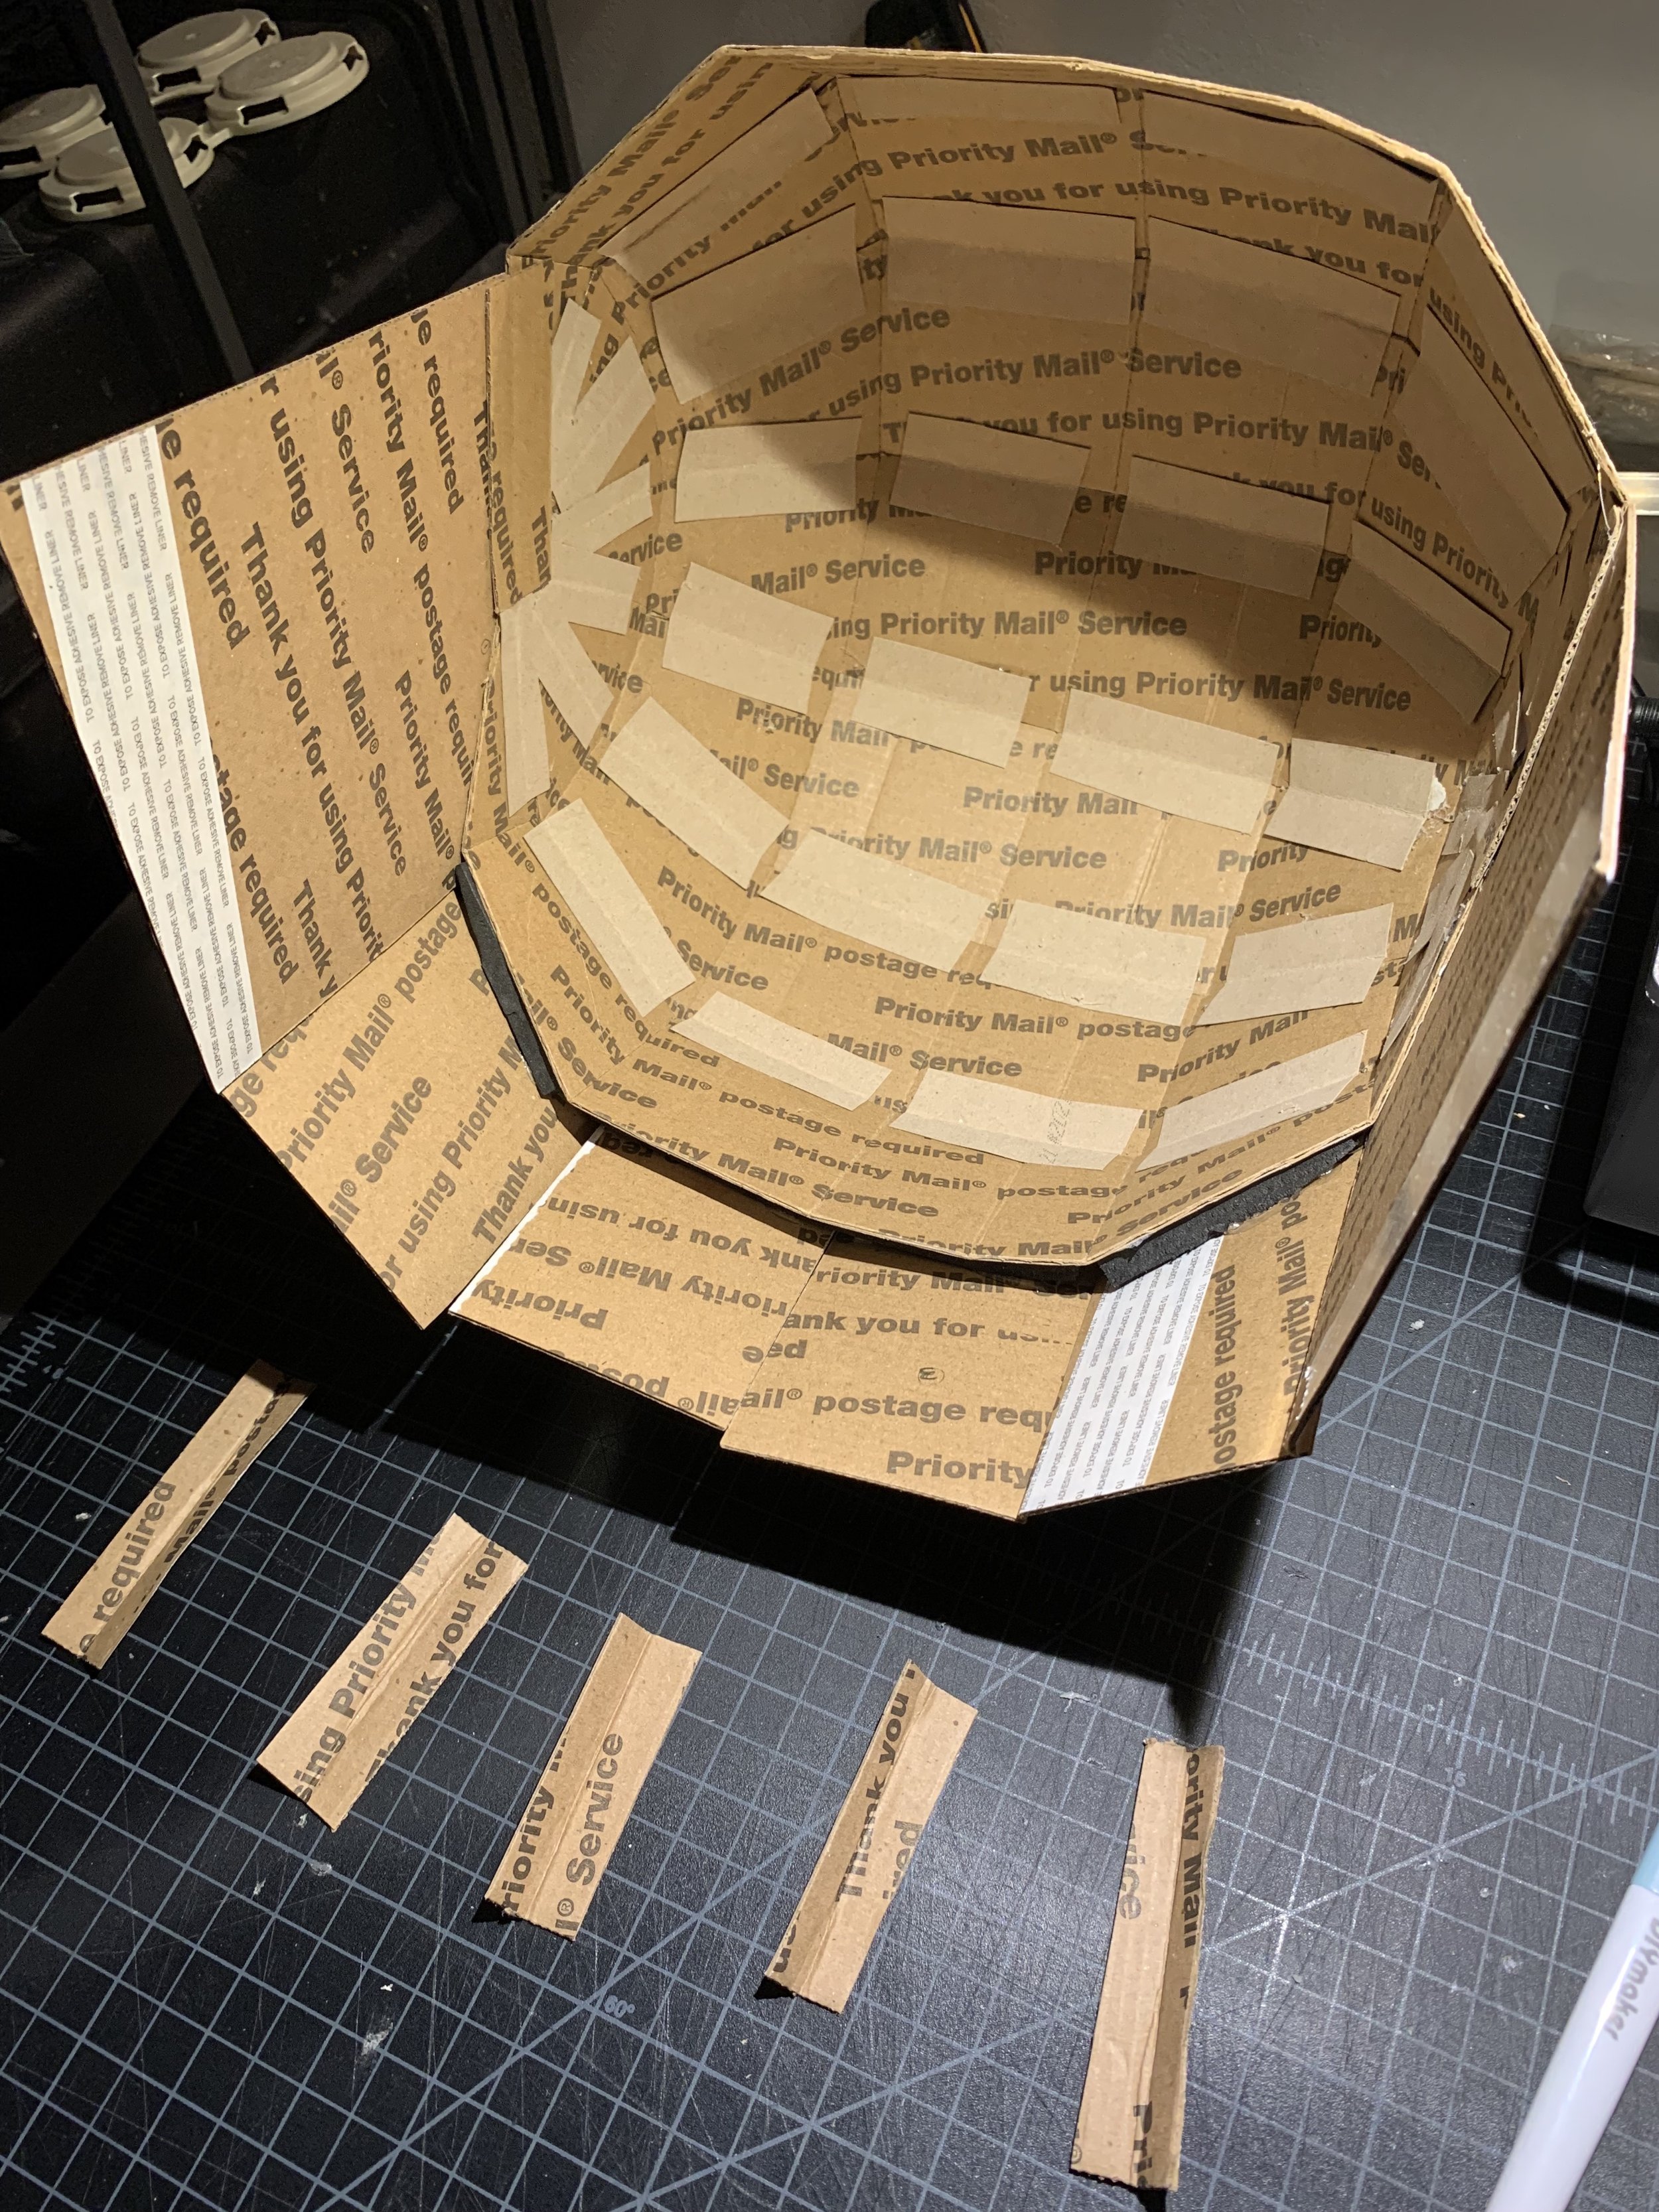
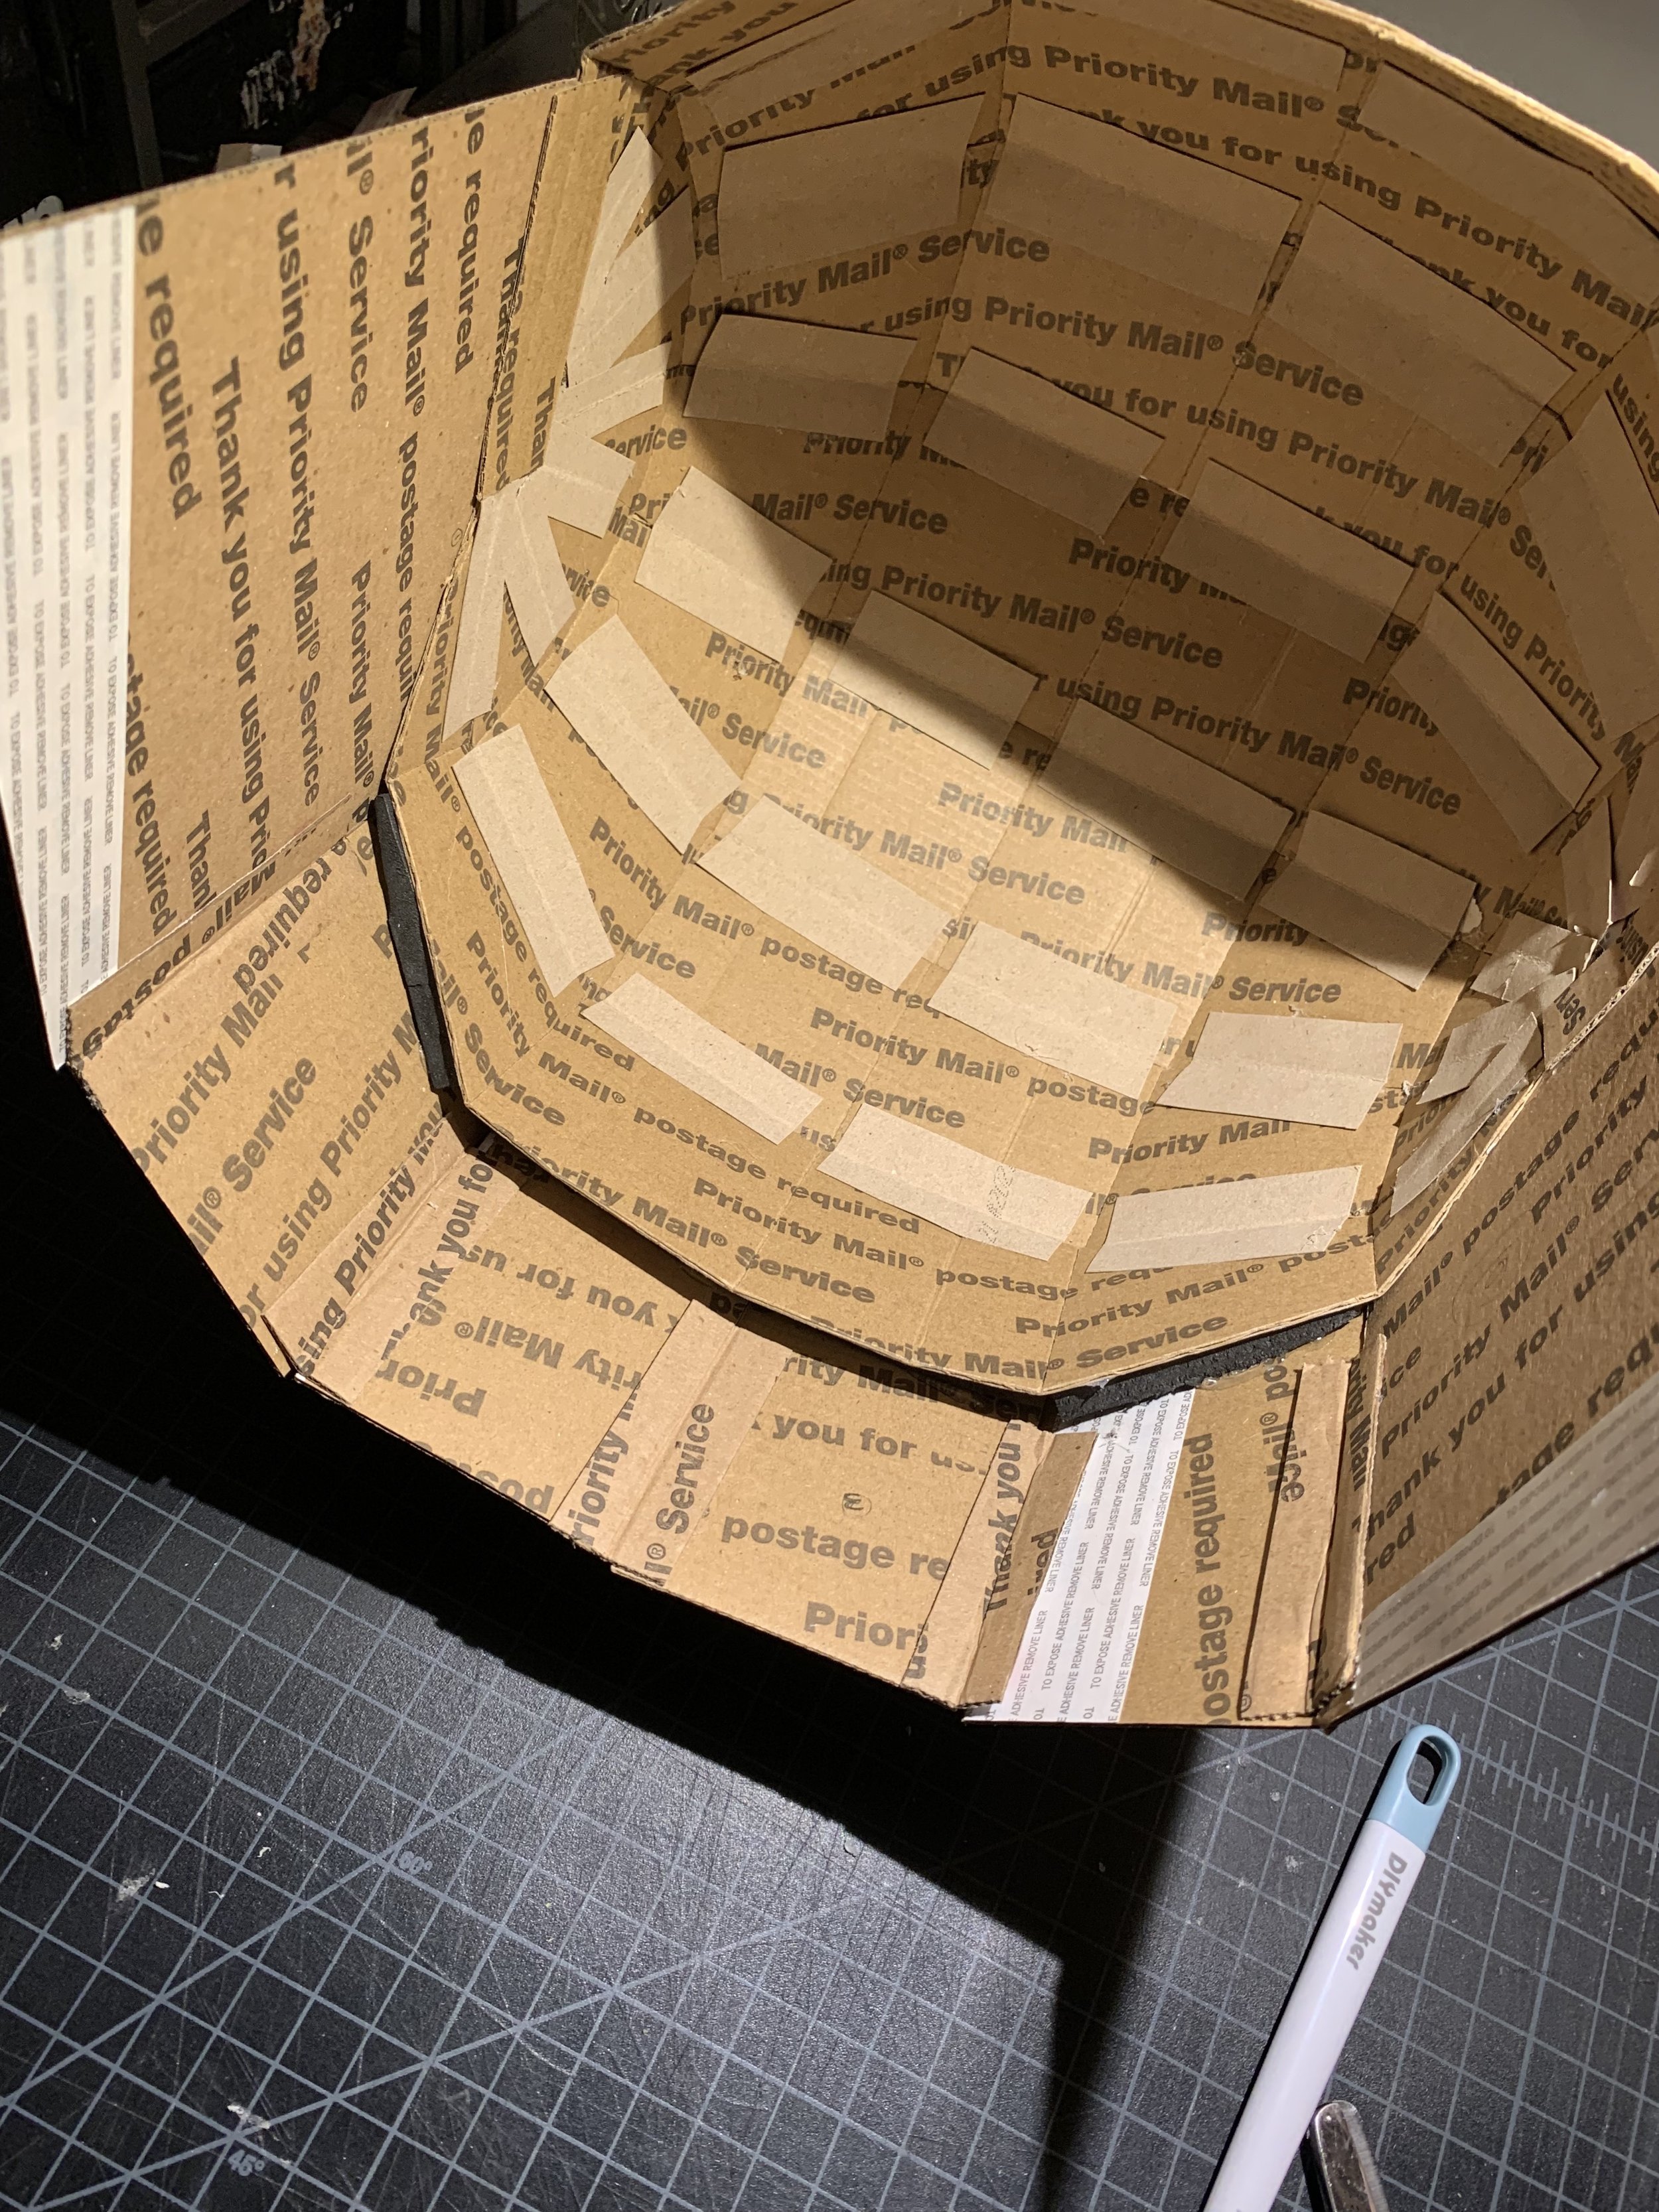
With your scored rectangles, start gluing the shell pieces together. You’ll notice that your shell will start to take shape and become bowl-like. If this isn’t happening for you, you’re doing something wrong.

Behold, the shell!
Creating Support for the Shell
Grats, you have a shell! Now you’re probably wondering how you’re going to keep it from rolling up every time you put it down. Well, let’s jump into creating some structural support for this thing. Note: the photos used for this section are from another build, but still apply to this build.
Print the shell support pattern (PDF) onto tabloid (11”x17”) paper.
Place your printed shell support pattern onto cardboard.
With a ruler, use an X-acto knife to trace/cut the pattern out of the cardboard.
You’re also going to need a 2nd set of these. Use the set that you just cut out as templates for your 2nd set. Trace, cut, repeat.
Shell Support Pattern PDF
Adding on the Shell Support Pieces
With the 6 shell support pieces that you just cut out, you’re going to glue them around the base of the bowl-like shell. This will eventually help open the bowl up and keep it opened.
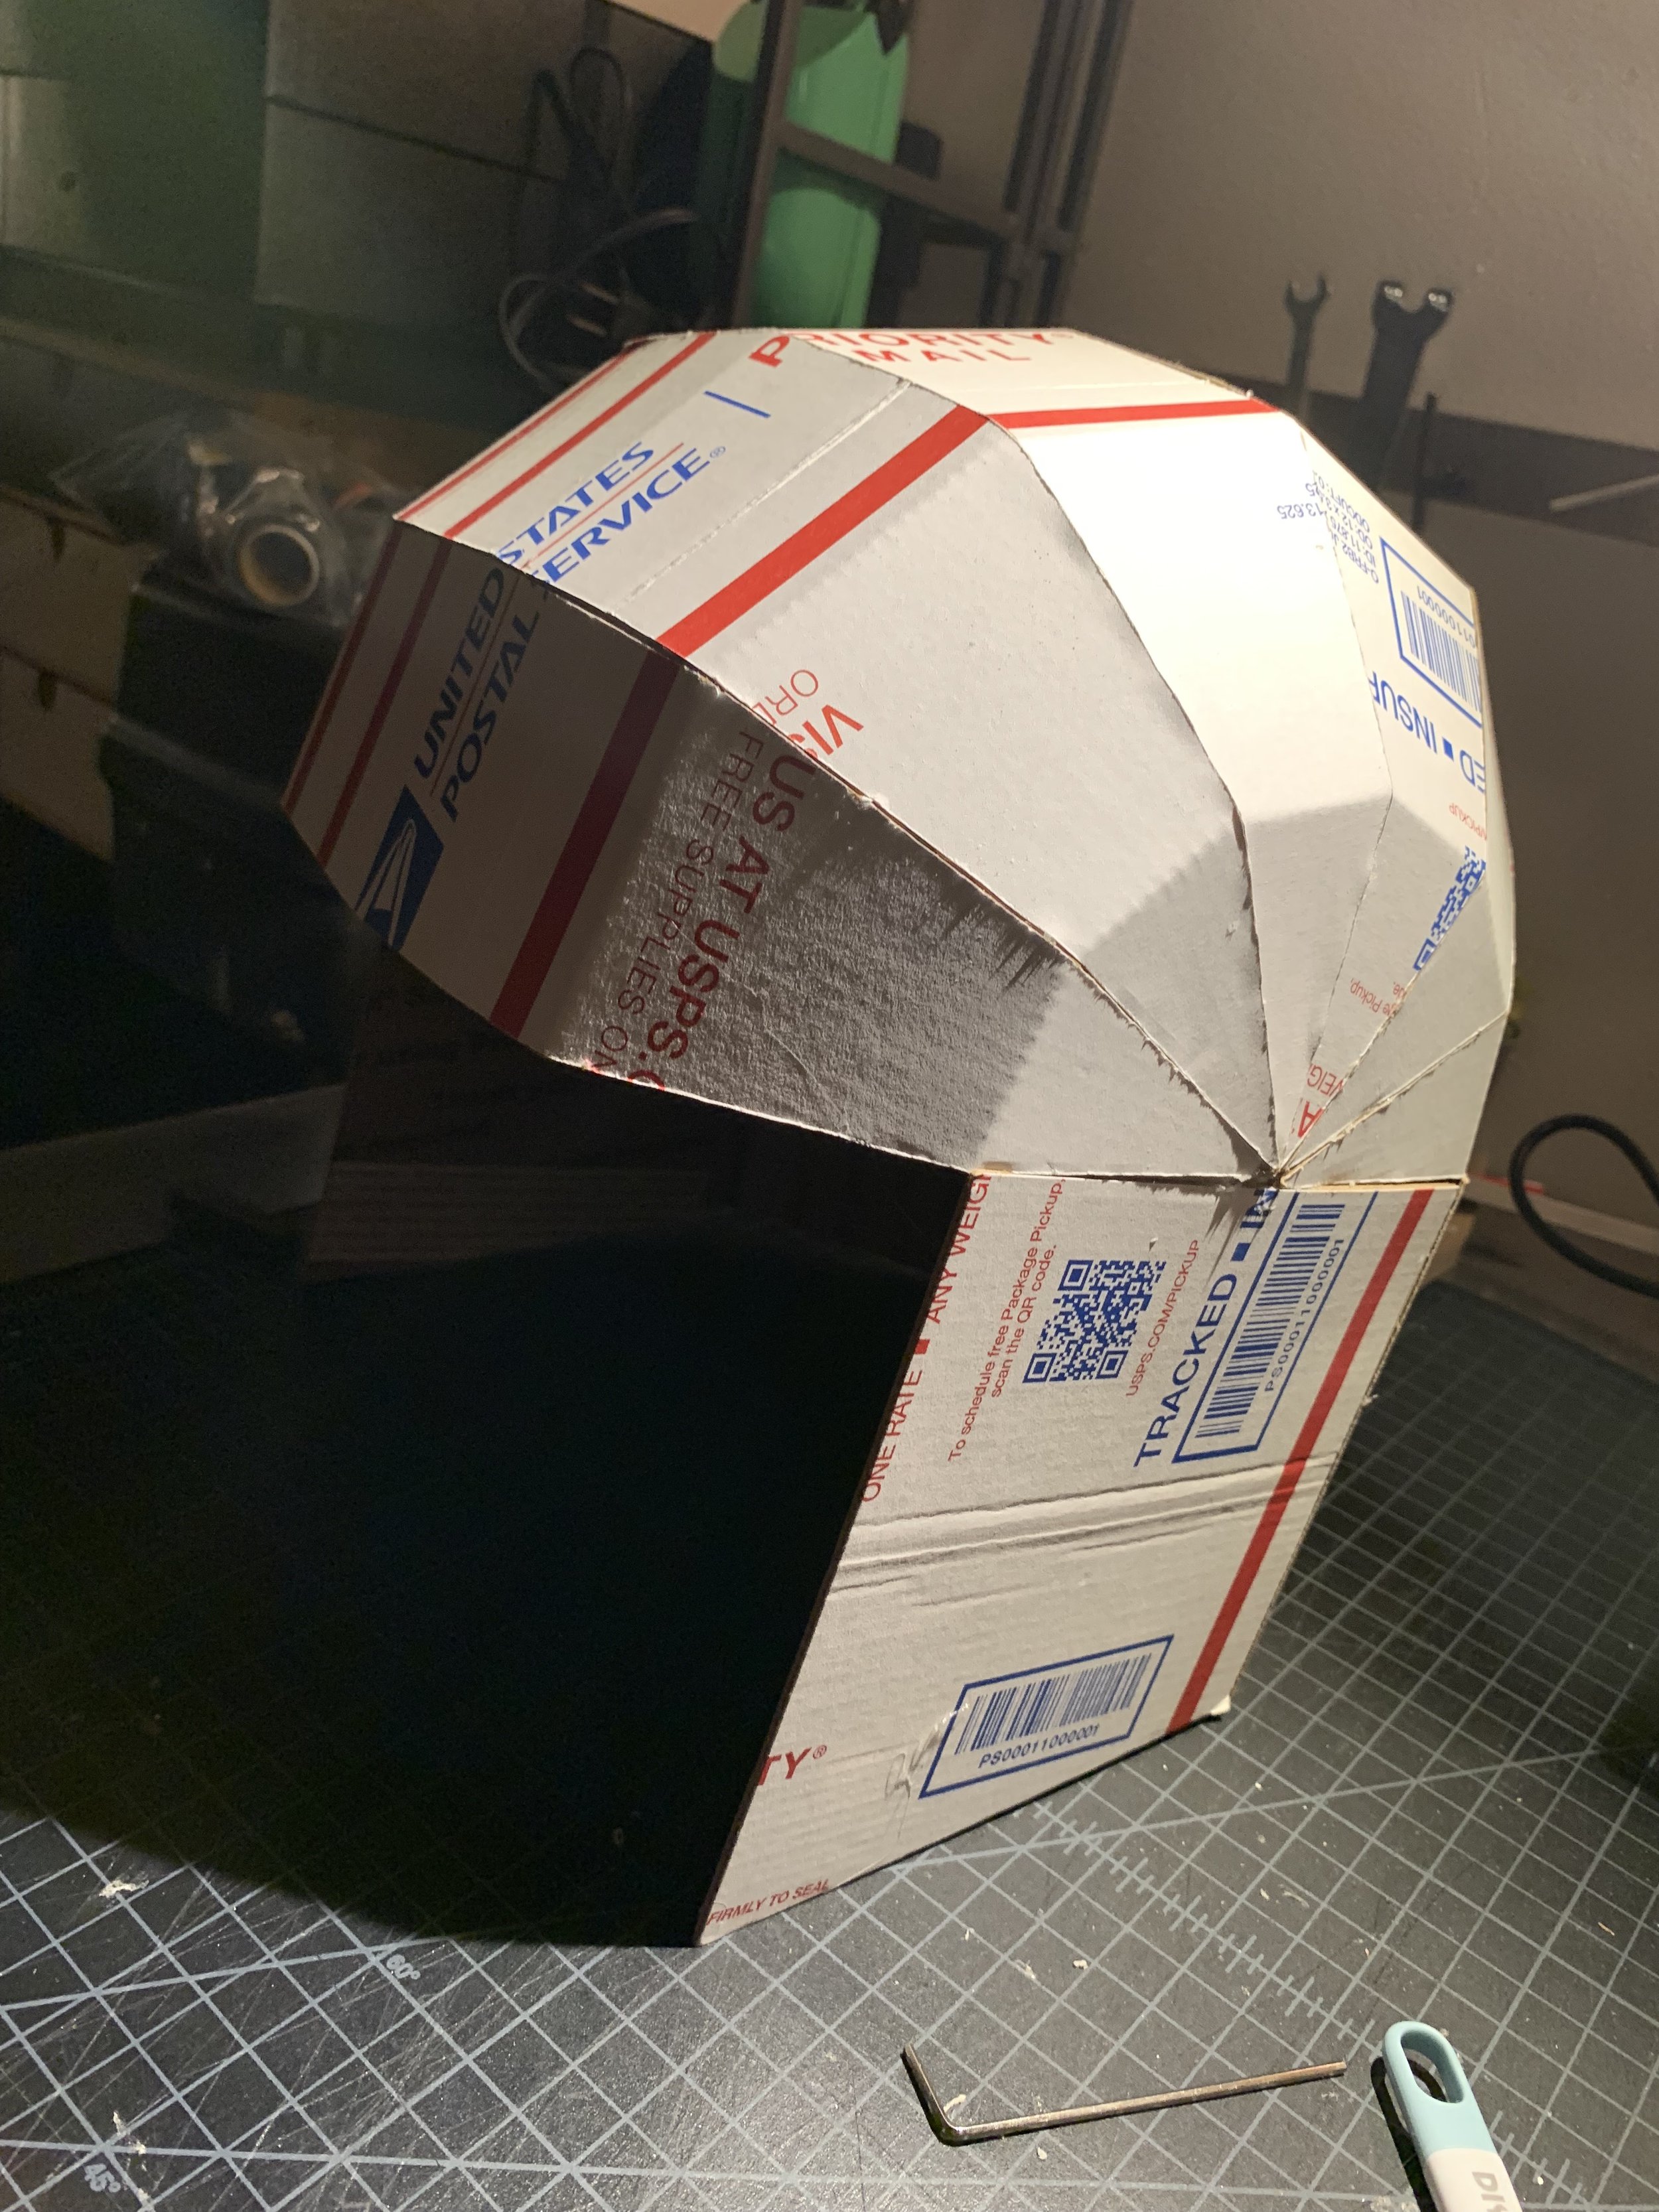
Expand your bowl-like shell by pushing on both sides of the shell where the pieces all converge.
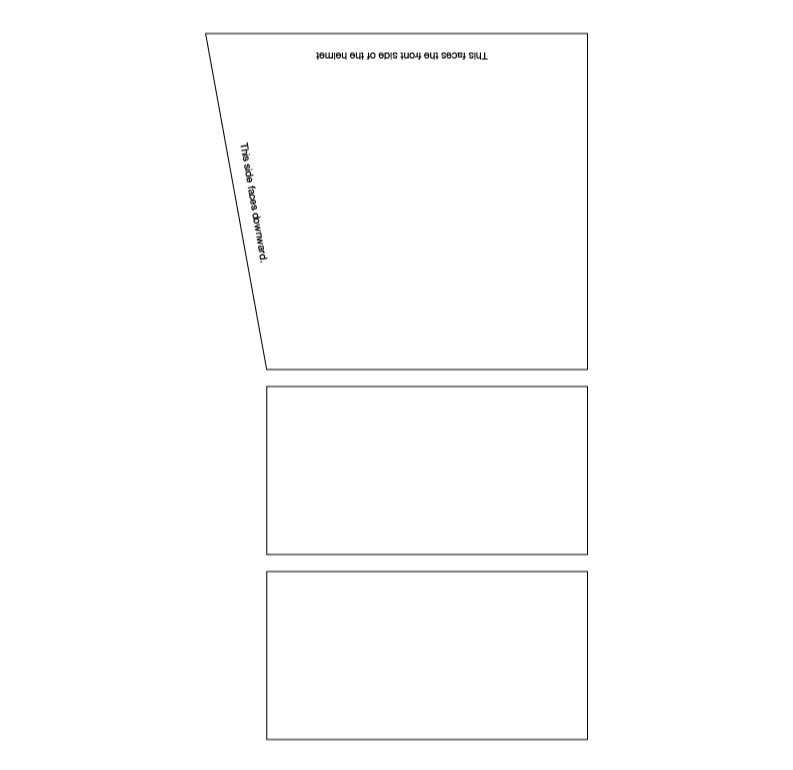
While keeping it expanded, glue the largest shell support piece that you just cut out to the side of the shell (refer to image below).
Make sure that the bottom of the shell support piece (the slanted side) is facing downwards.
Once the piece is glued on, you’re going to cut a cardboard rectangle measuring 2”x0.75”.
Glue the rectangle on the inside of the shell over where the edge of the shell support piece borders the shell itself (refer to image below).
Repeat steps 1-4 for the other side of shell.

Step 2: Glue the largest shell support piece to the outside of the shell.

Step 3-4: Glue rectangle on the inside of the shell where the shell support piece borders the shell itself.

Adding on the Rest of the Shell Support Pieces
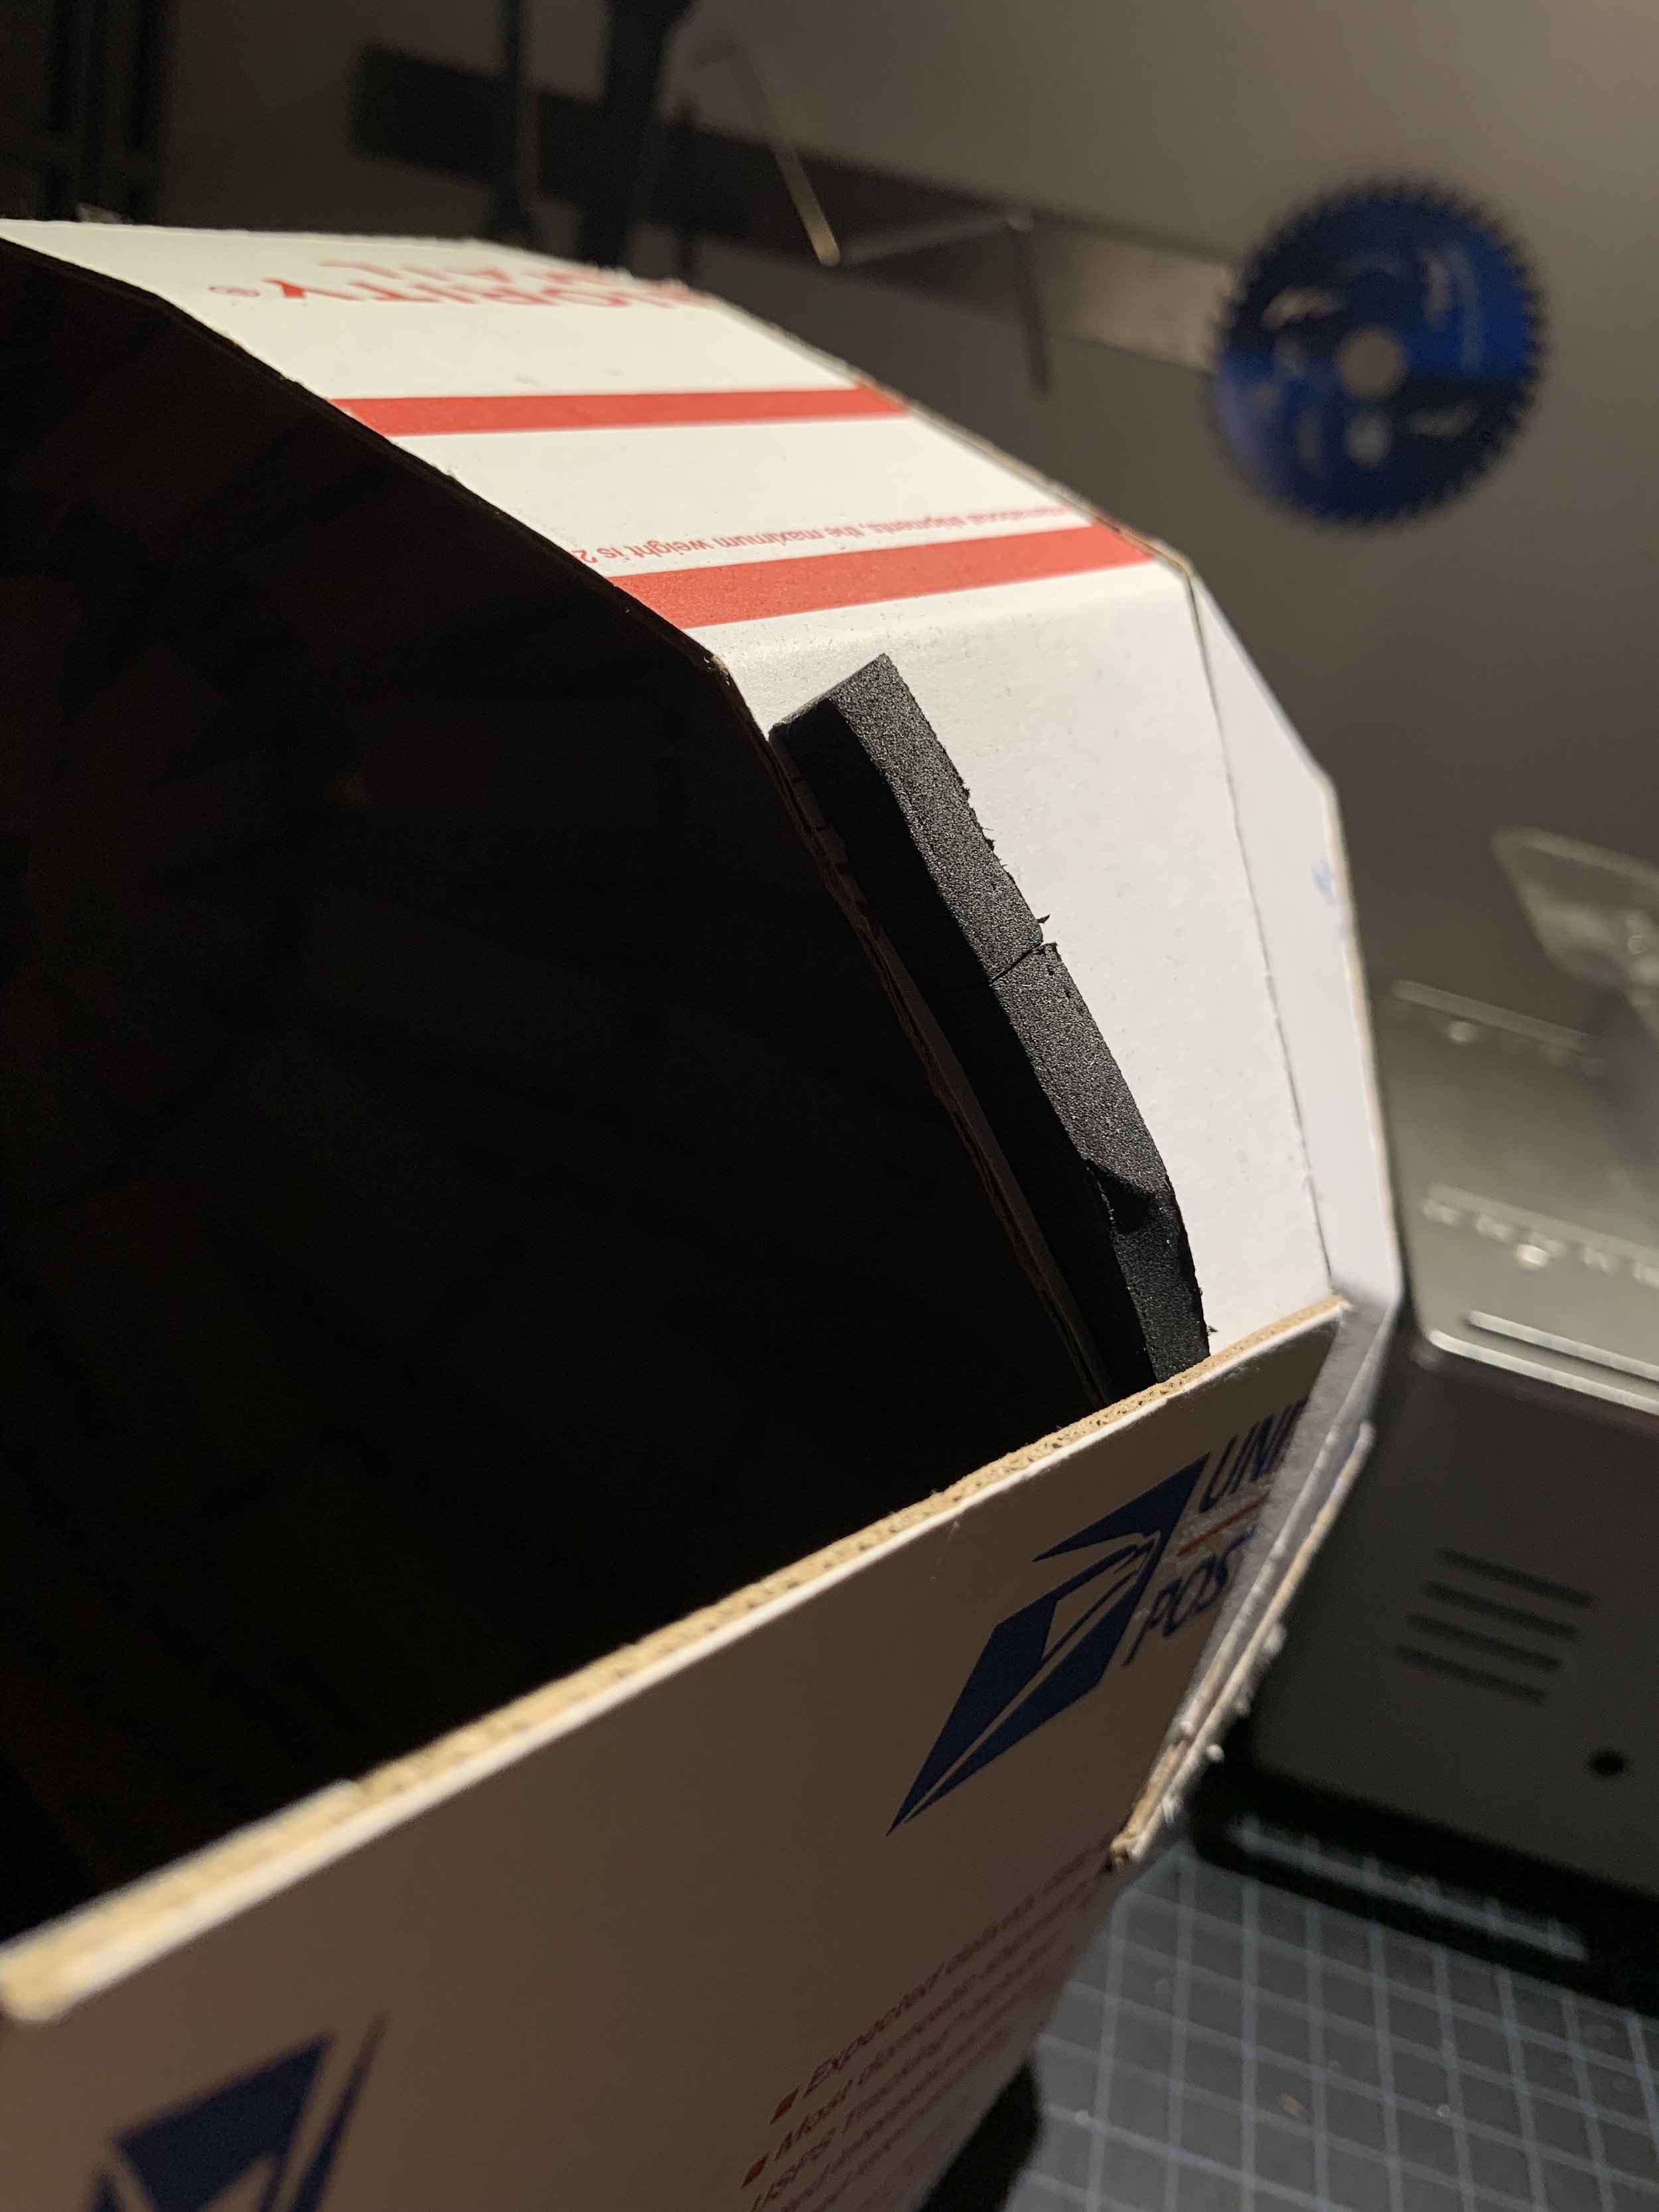
Now you should have 4 remaining shell support pieces (rectangles). These will go around the back side of the shell. You’ll also be cutting some EVA foam strips, which will be used as shims. These foam strips will ensure that once you add the 4 remaining rectangles, you’ll have a close to perfect cylindrical helmet.
Cut 4 pieces of EVA foam strips, each strip measuring about 2.5”x0.75”.
Glue each EVA foam strip around the back bottom half of the shell. Even though the visualization below shows 3 strips, there’s actually a 4th one out of view.
Glue each rectangular shell support piece (vertical-wise) onto the shell. Make sure that the top of the rectangle lines up with the other shell support pieces that are already on the shell.
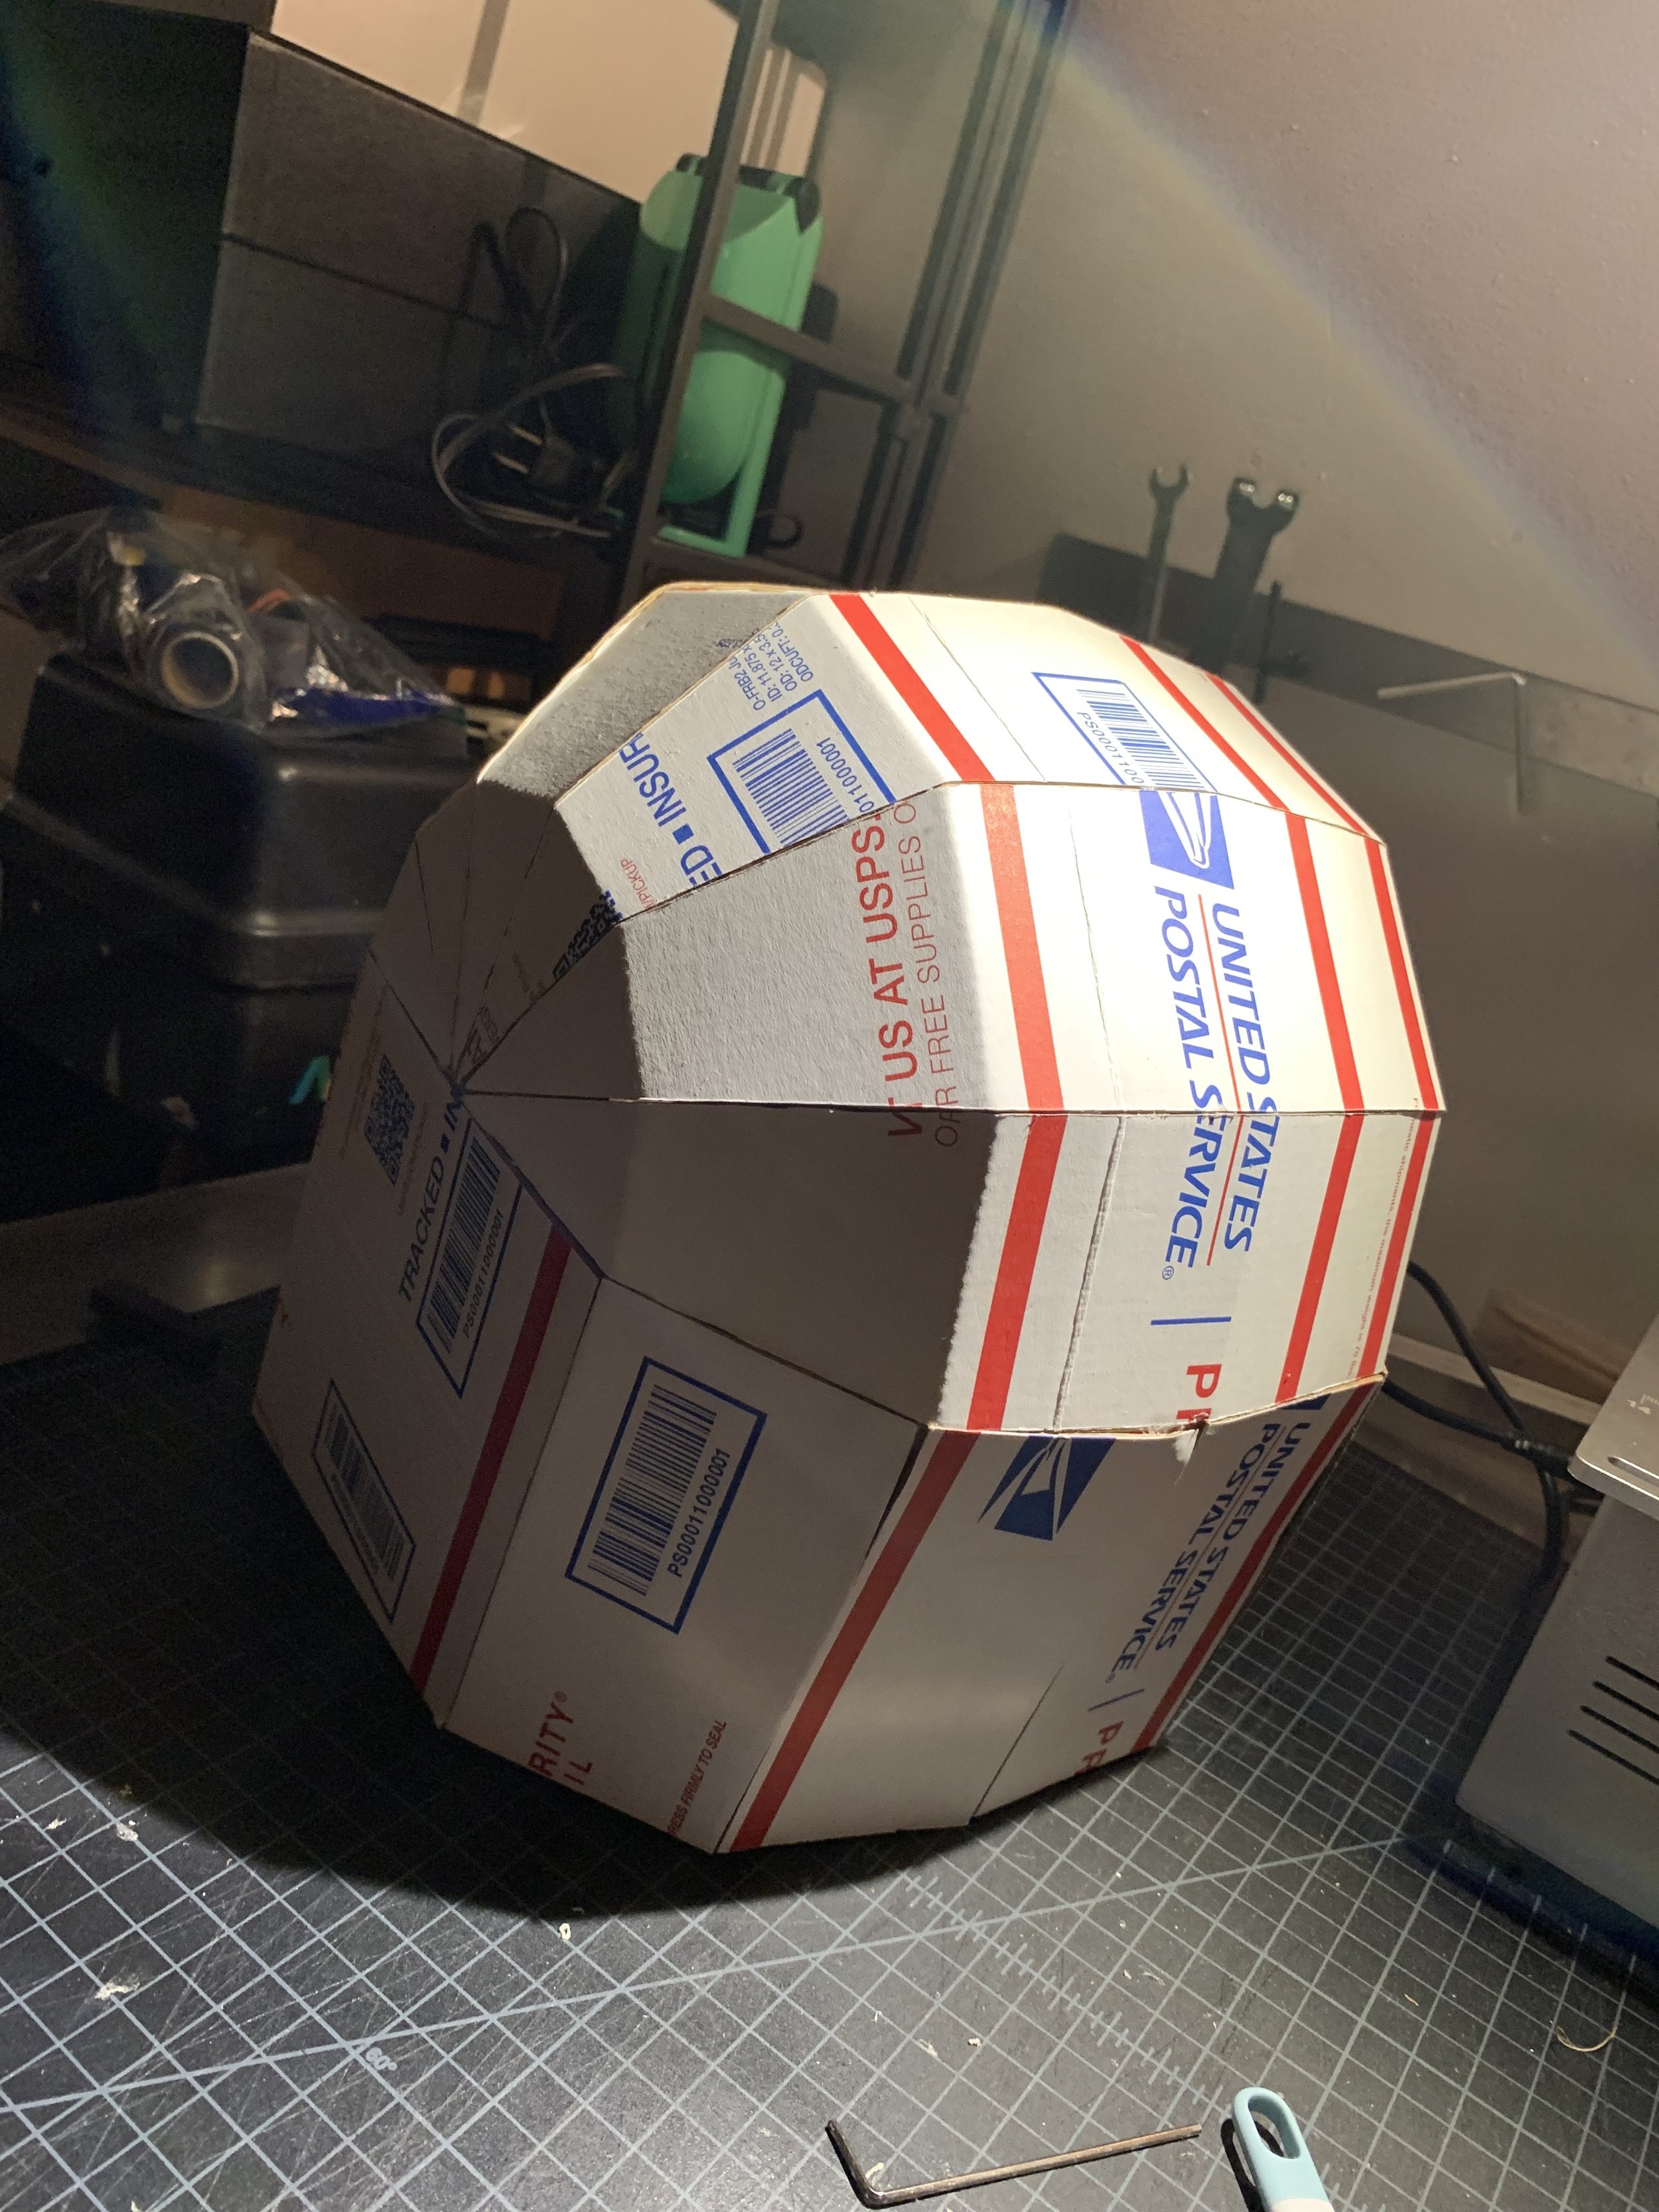
Once you have all the pieces on, it should look sort of look like Magneto’s helmet. You’ll also notice that the shell support pieces that you just glued on might seem a little flimsy since they’re not connected to each other. We’re going to fix that in the next couple of steps.
Using cardboard scraps, cut out 5 rectangles measuring about 1.25”x.75”.
Once you have your rectangles, score them lengthwise.
With your scored rectangles, start gluing the shell support pieces together from the inside (refer to image below).
Voila, your shell is complete!

A visualization of steps 1-4
Prepping and Adding the Sides
For this part of the project, we’re going to create the pieces that run vertically along the sides of the helmet.
Print the side shell pattern (PDF) onto letter (8.5”x11”) paper.
Place your side shell pattern onto cardboard.
With a ruler, use an X-acto knife to trace/cut the pattern out of the cardboard. Note: you’re going to need two of these pieces.
Using your cardboard cutouts, trace/cut the same pattern out of EVA foam. Again, you’re going to need two pieces.
Mount and glue the side shell cardboard cutout onto the EVA foam cutout.
Glue the side shell piece onto the side of the helmet. Make sure the bottom of the side shell piece is aligned with the bottom of the helmet.

Side Shell Pattern PDF


Side shell mounted/glued onto helmet
Prepping the Face Guard
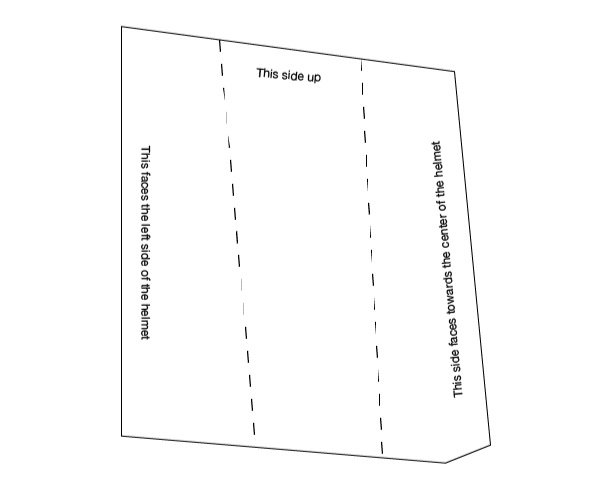
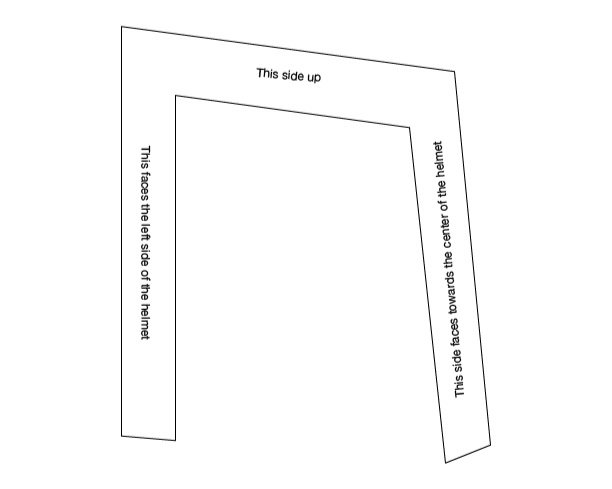
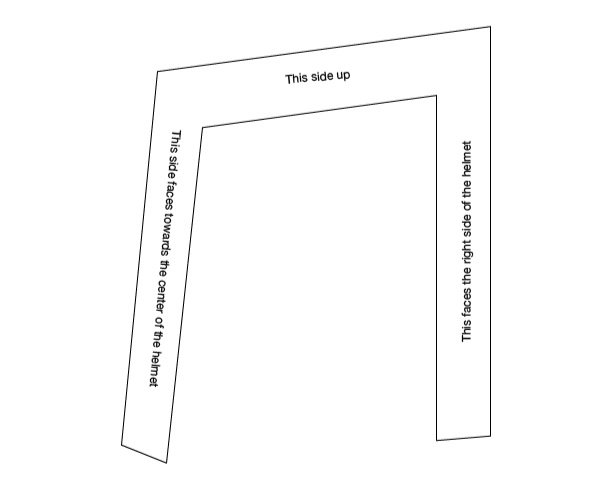
Print face guard pattern left (PDF) and face guard pattern right (PDF), each onto letter (8.5”x11”) paper.
Place your face guard pattern onto cardboard.
With a ruler, use an X-acto knife to trace/cut the pattern out of the cardboard.
With your scoring tool, score the dashed lines on the inside of the face guard cutout.

Prepping the Top Layer of the Face Guard
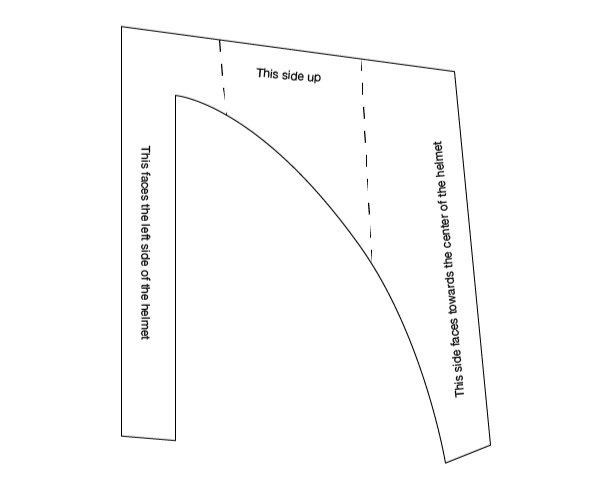
Print face guard top layer left (PDF) and face guard top layer right (PDF), each onto letter (8.5”x11”) paper.
Place your face guard top layer pattern onto cardboard.
With a ruler, use an X-acto knife to trace/cut the pattern out of the cardboard. For the curved part, use a scissor.
With your scoring tool, score the dashed lines on the inside of the face guard cutout.

Prepping the Mid Layer of the Face Guard
Print both face guard mid layer left (PDF) and face guard mid layer right (PDF), each onto letter (8.5”x11”) paper.
Place your face guard top layer pattern onto EVA foam.
With a ruler, use an X-acto knife to trace/cut the pattern out of the cardboard.
Bringing the Face Guard Together
So you should now have the following pieces:
2x Face guard (L/R)
2x Face guard top layer (L/R)
2x Face guard mid layer (L/R)
Let’s bring these pieces together.
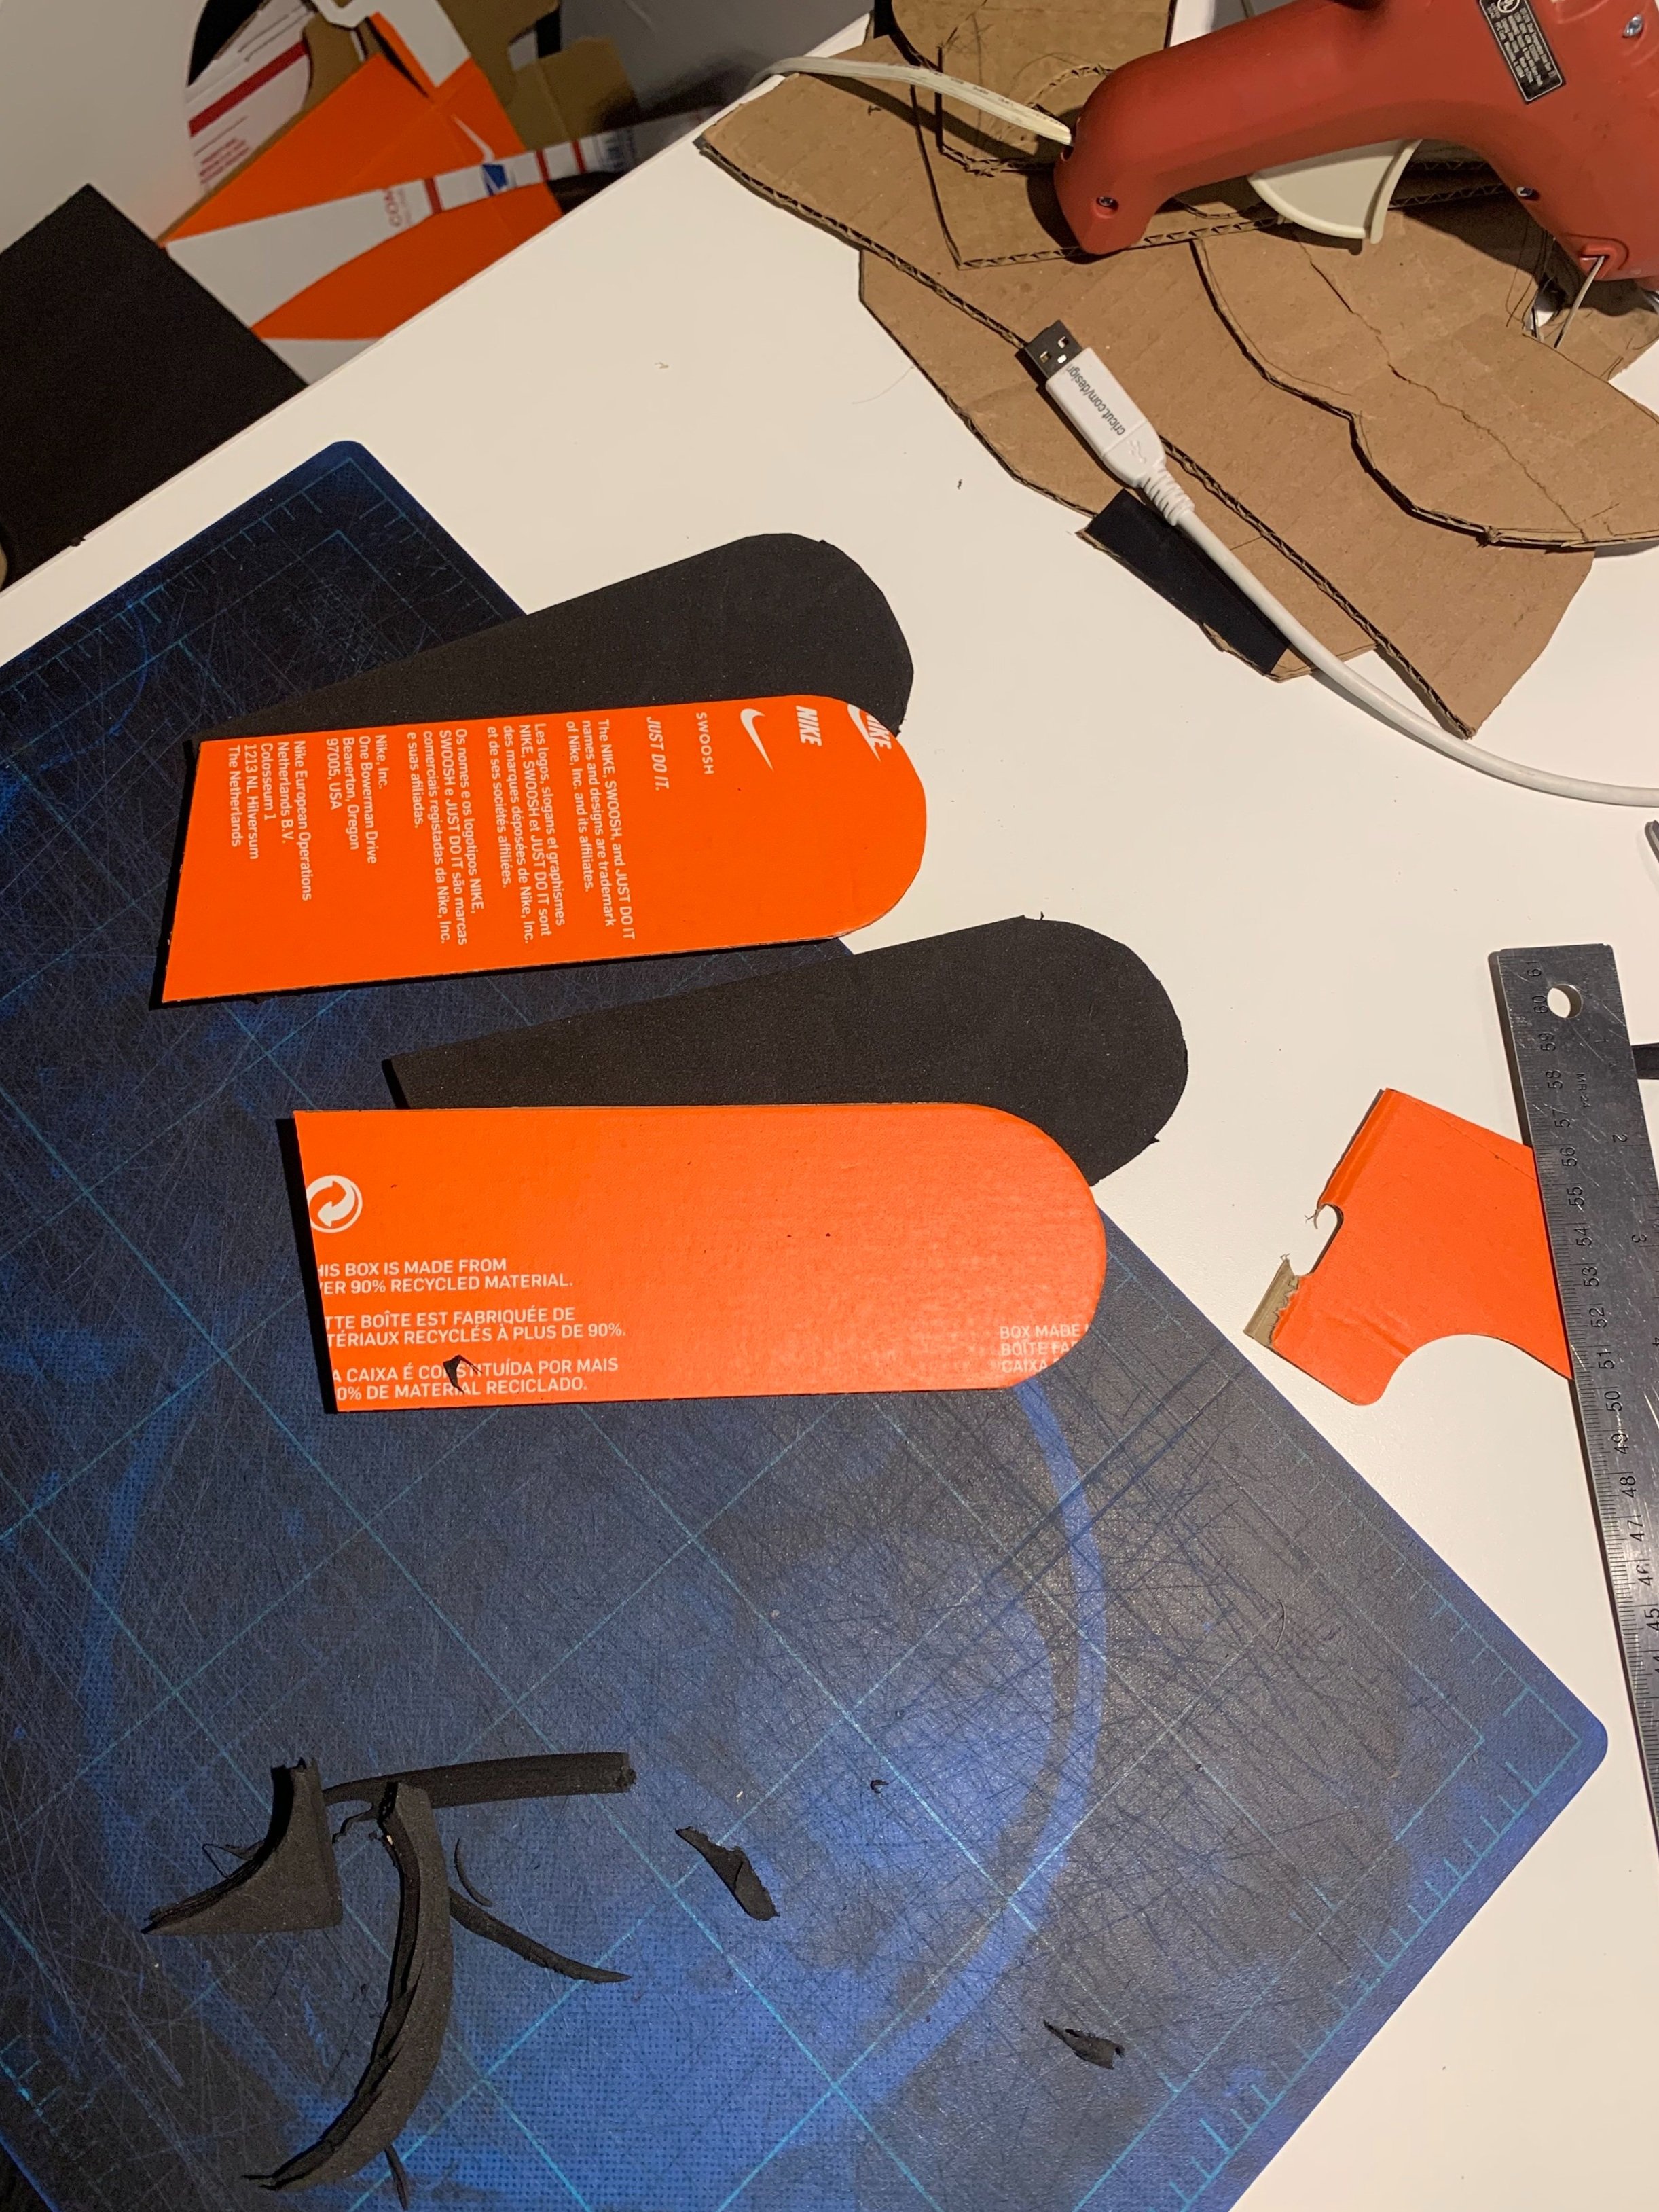
Mount and glue the top face guard layer onto the EVA foam mid layer. Do it for both left and right sides.
Mount and glue that piece onto the face guard layer. Do it for both left and right sides.
Attaching the Face Guards to the Helmet
Using cardboard scraps, cut 2 rectangles, each measuring 5.25”x0.75”.
Score each rectangle down the middle, lengthwise.
For the left face guard, glue the rectangle vertically along the left edge on the backside. Repeat this for the right side.
Glue the face guard to the helmet (refer to animation below).
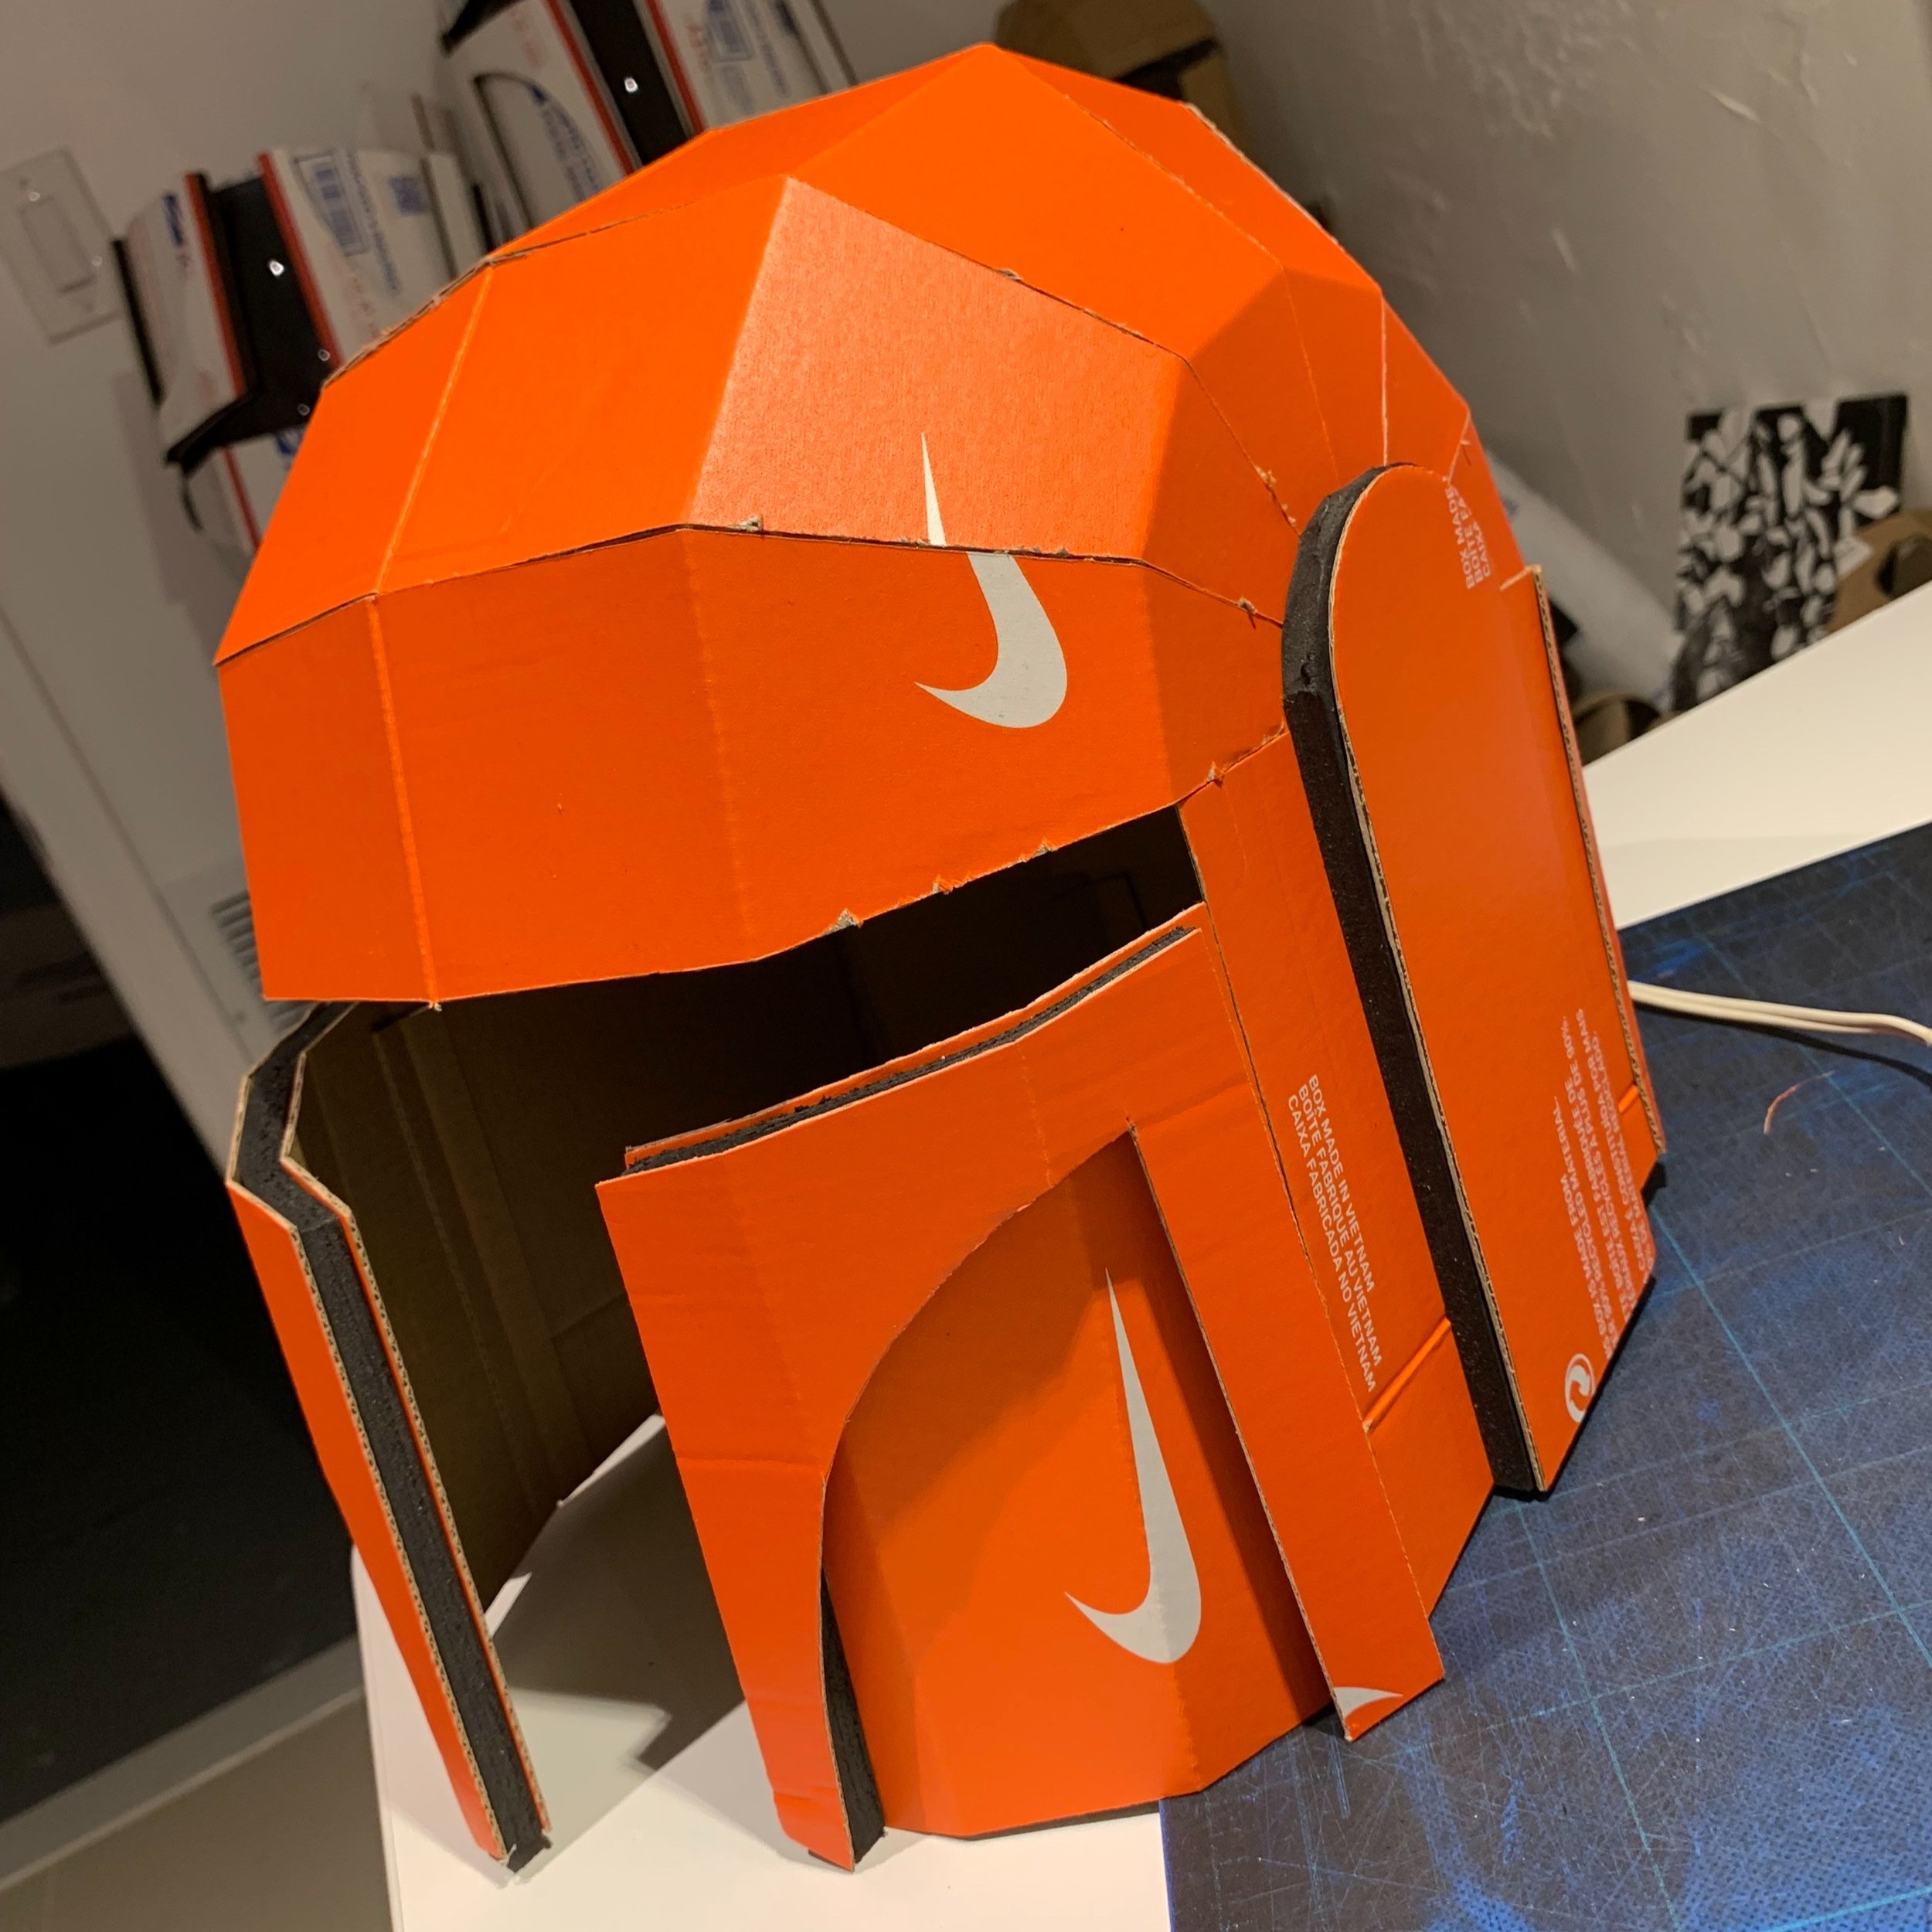
Almost there.
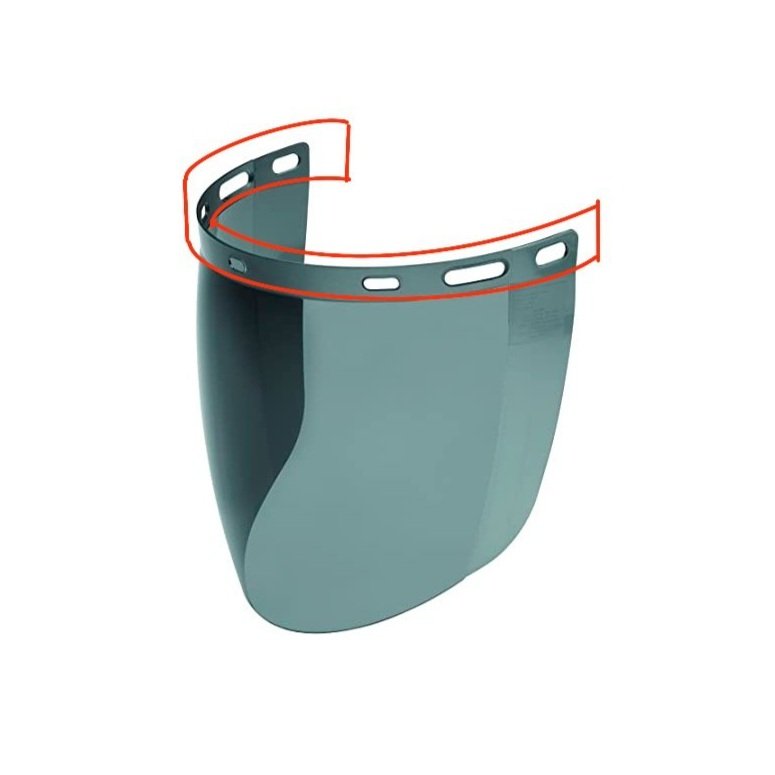
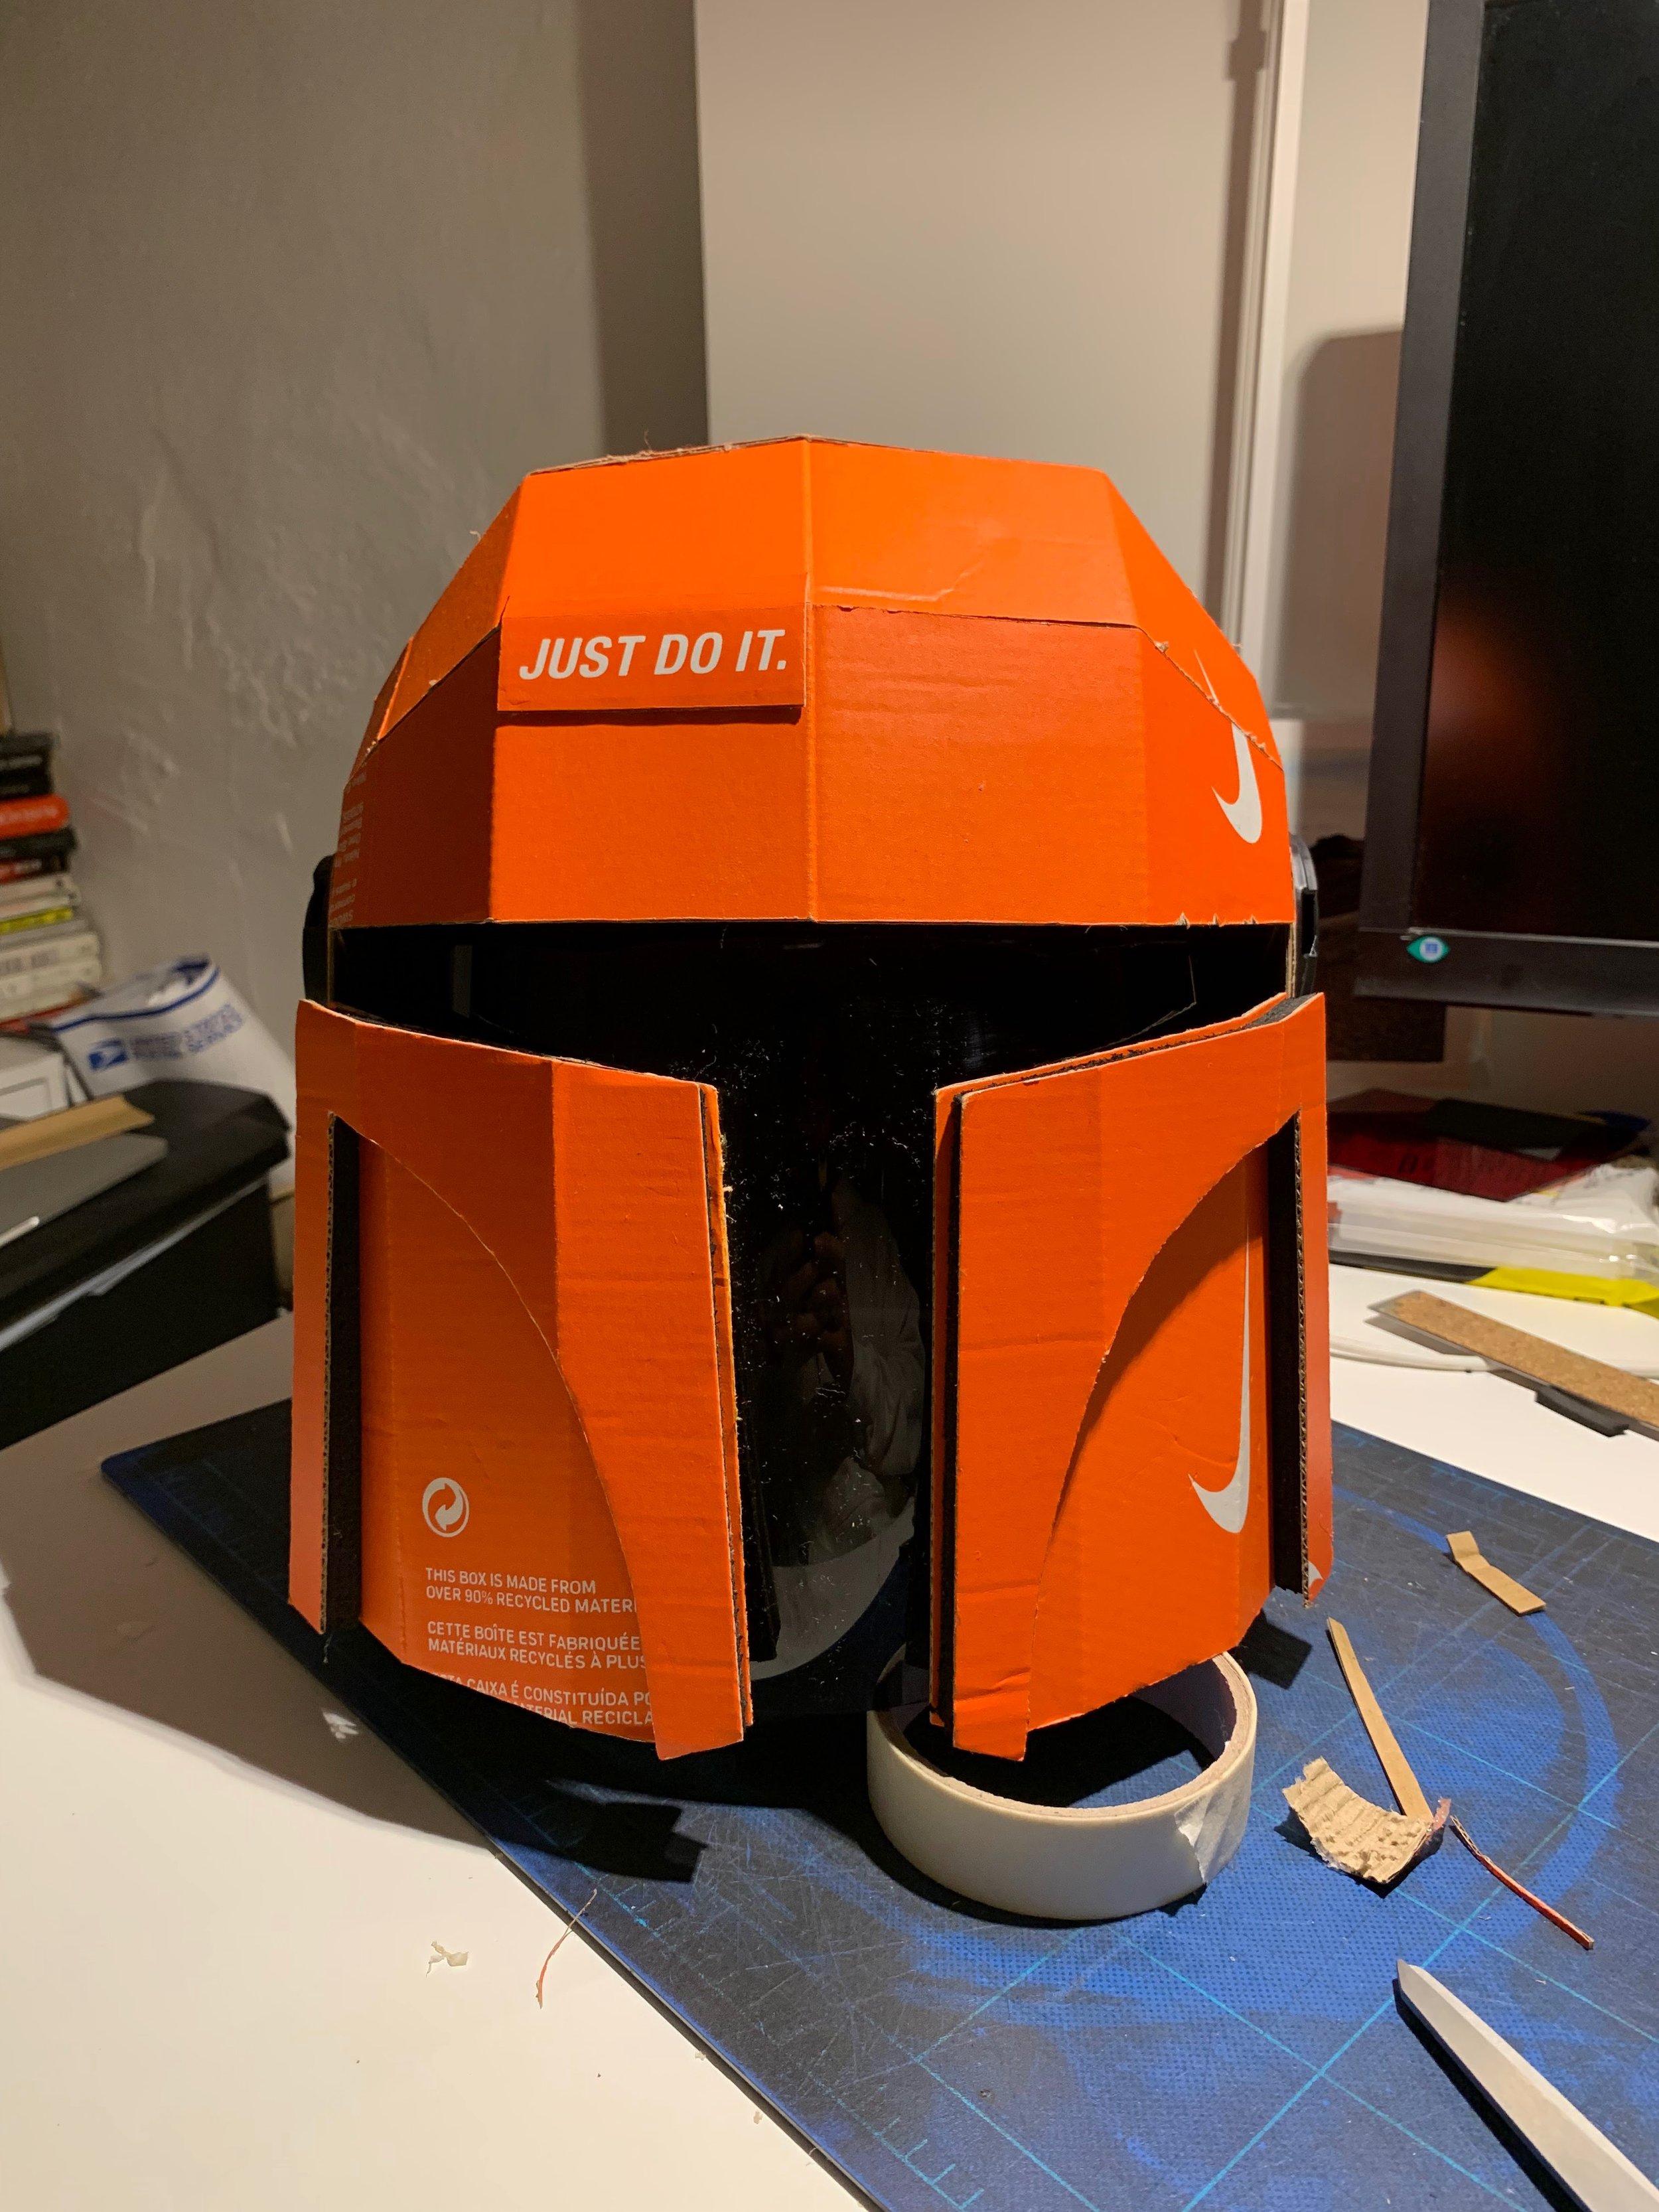
Attaching the Visor
This part of the build required a few tries for me, so be patient.
Using your utility shears, remove the top tab of the visor (refer to image below). The height of your visor should be 8” at its tallest point.
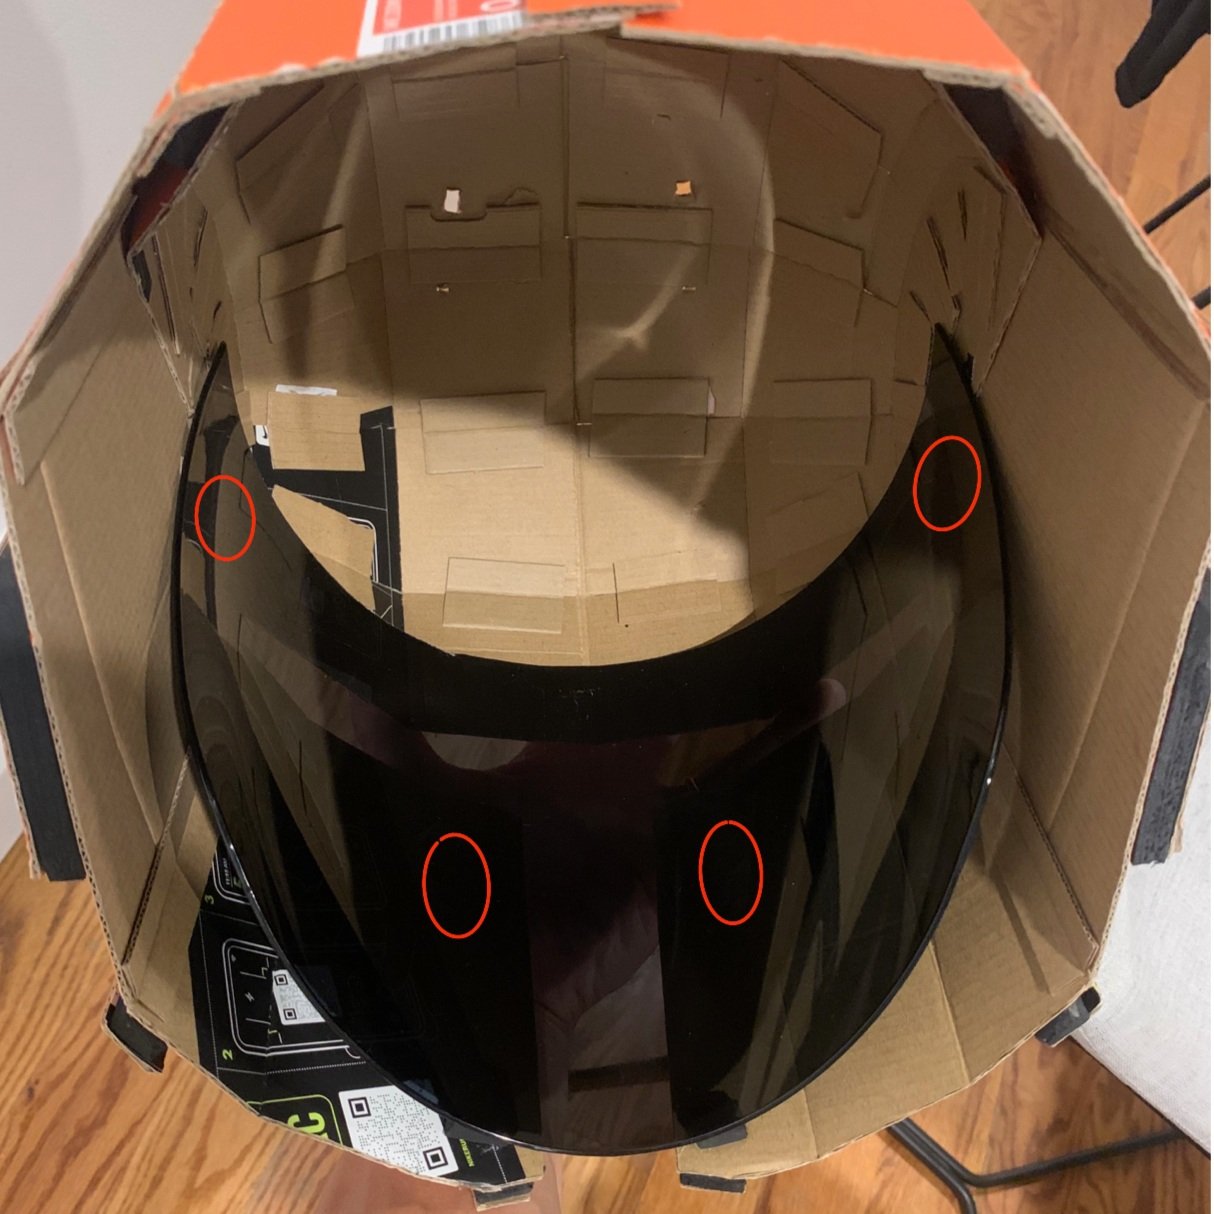
Place your visor into your helmet and note the 4 spots where your visor makes contact with your helmet. The bottom edge of the visor should line up with the bottom edge of your face guards. These 4 spots are where you’ll be adding glue to.
Once you’ve mentally noted your 4 spots, add glue to those spots inside the helmet and then quickly place your visor into position. Make sure that the glue points are connecting to the visor.
Final Touches
Before we wrap up, make sure to make use of those plastic can carriers.
Cut a few small pieces of EVA foam (or cardboard).
Stack the pieces under the can carrier to the point where the bottom sits flush with the rest of the can carrier.
Once you have your pieces, glue the stack together.
Glue the stack to the underside of the can carrier.
Glue the resulting piece to the side of the helmet. Refer to the image below for placement.
Don’t forget to the do the other side.

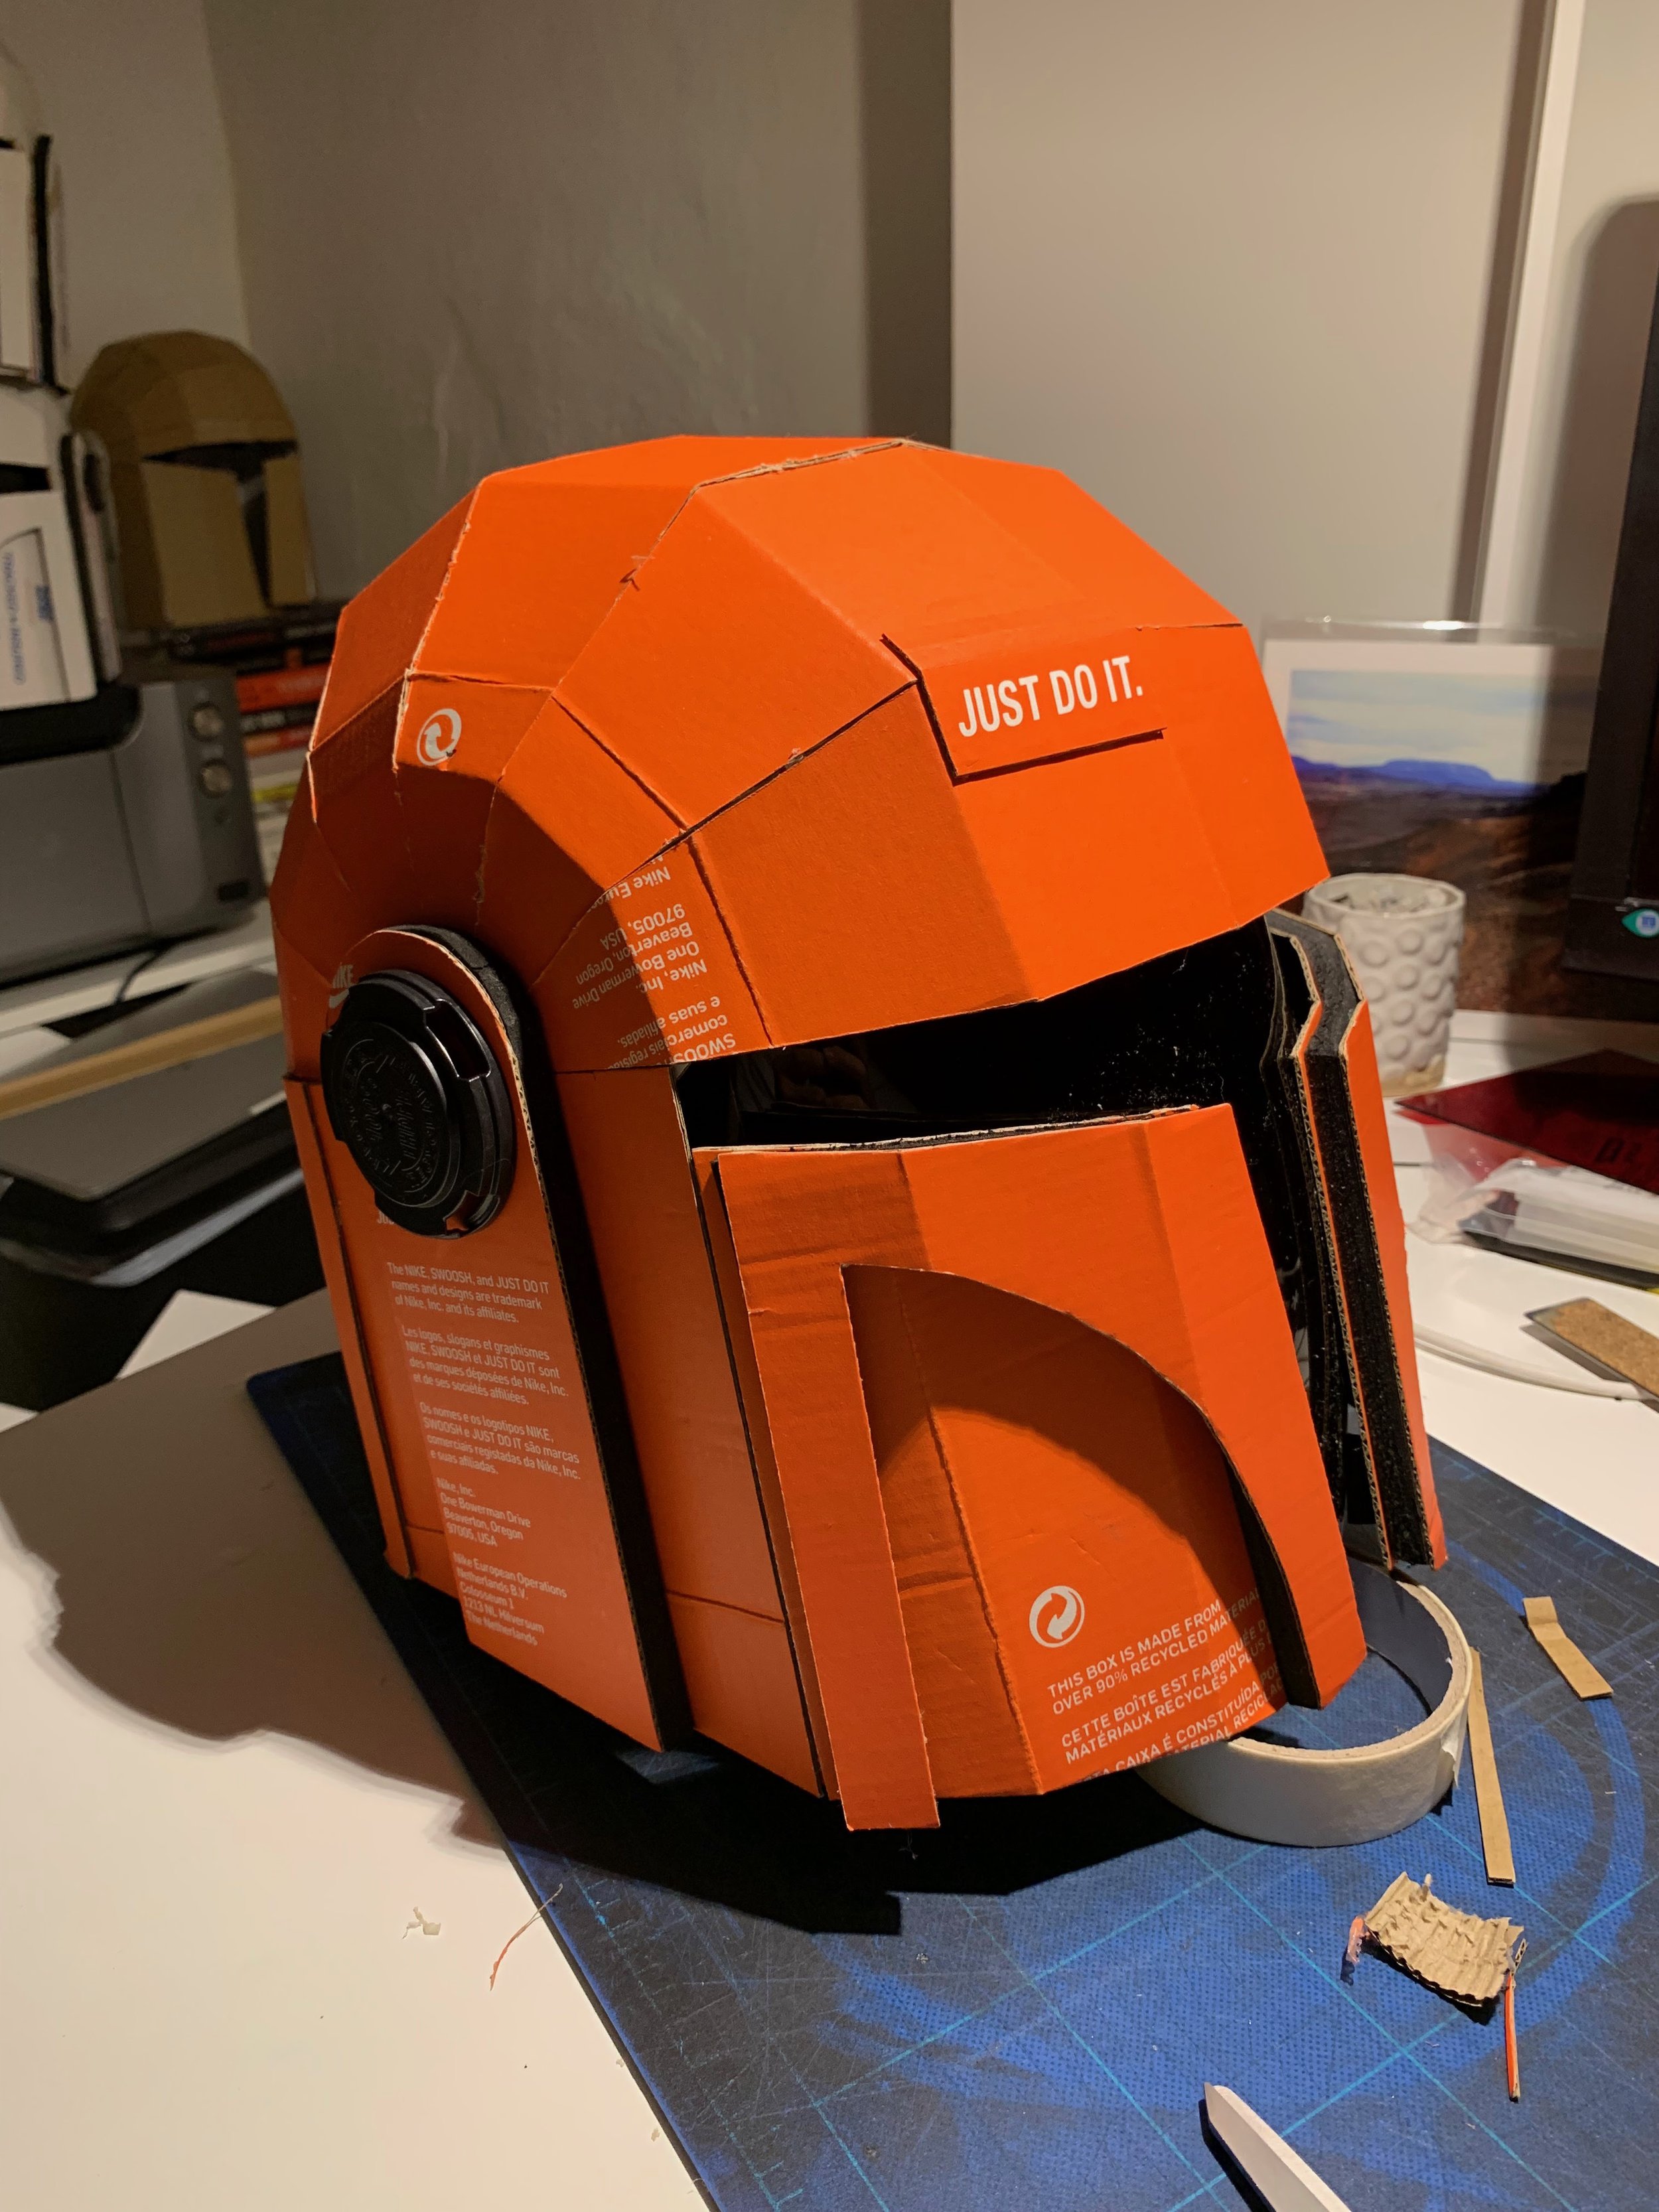
And we’re done!
Once your helmet is complete, carefully place your bike helmet into the Mandalorian helmet. Once it’s in, cut two holes at the top of the helmet and zip tie it to your bike helmet. This is the Way.